A PHP Error was encountered
Severity: Warning
Message: Trying to access array offset on value of type null
Filename: front_pages/news_single.php
Line Number: 169
Backtrace:
File: /home2/teamagsf/public_html/application/views/front_pages/news_single.php
Line: 169
Function: _error_handler
File: /home2/teamagsf/public_html/application/core/MY_Controller.php
Line: 24
Function: view
File: /home2/teamagsf/public_html/application/controllers/FrontMainController.php
Line: 133
Function: frontLayout
File: /home2/teamagsf/public_html/index.php
Line: 316
Function: require_once
A PHP Error was encountered
Severity: Warning
Message: Trying to access array offset on value of type null
Filename: front_pages/news_single.php
Line Number: 172
Backtrace:
File: /home2/teamagsf/public_html/application/views/front_pages/news_single.php
Line: 172
Function: _error_handler
File: /home2/teamagsf/public_html/application/core/MY_Controller.php
Line: 24
Function: view
File: /home2/teamagsf/public_html/application/controllers/FrontMainController.php
Line: 133
Function: frontLayout
File: /home2/teamagsf/public_html/index.php
Line: 316
Function: require_once
by
A PHP Error was encountered
Severity: Warning
Message: Trying to access array offset on value of type null
Filename: front_pages/news_single.php
Line Number: 182
Backtrace:
File: /home2/teamagsf/public_html/application/views/front_pages/news_single.php
Line: 182
Function: _error_handler
File: /home2/teamagsf/public_html/application/core/MY_Controller.php
Line: 24
Function: view
File: /home2/teamagsf/public_html/application/controllers/FrontMainController.php
Line: 133
Function: frontLayout
File: /home2/teamagsf/public_html/index.php
Line: 316
Function: require_once
A PHP Error was encountered
Severity: Warning
Message: Trying to access array offset on value of type null
Filename: helpers/front_helper.php
Line Number: 115
Backtrace:
File: /home2/teamagsf/public_html/application/helpers/front_helper.php
Line: 115
Function: _error_handler
File: /home2/teamagsf/public_html/application/views/front_pages/news_single.php
Line: 182
Function: get_admin_name
File: /home2/teamagsf/public_html/application/core/MY_Controller.php
Line: 24
Function: view
File: /home2/teamagsf/public_html/application/controllers/FrontMainController.php
Line: 133
Function: frontLayout
File: /home2/teamagsf/public_html/index.php
Line: 316
Function: require_once
|
A PHP Error was encountered
Severity: Warning
Message: Trying to access array offset on value of type null
Filename: front_pages/news_single.php
Line Number: 182
Backtrace:
File: /home2/teamagsf/public_html/application/views/front_pages/news_single.php
Line: 182
Function: _error_handler
File: /home2/teamagsf/public_html/application/core/MY_Controller.php
Line: 24
Function: view
File: /home2/teamagsf/public_html/application/controllers/FrontMainController.php
Line: 133
Function: frontLayout
File: /home2/teamagsf/public_html/index.php
Line: 316
Function: require_once
A PHP Error was encountered
Severity: Warning
Message: Trying to access array offset on value of type null
Filename: helpers/front_helper.php
Line Number: 115
Backtrace:
File: /home2/teamagsf/public_html/application/helpers/front_helper.php
Line: 115
Function: _error_handler
File: /home2/teamagsf/public_html/application/views/front_pages/news_single.php
Line: 182
Function: get_admin_name
File: /home2/teamagsf/public_html/application/core/MY_Controller.php
Line: 24
Function: view
File: /home2/teamagsf/public_html/application/controllers/FrontMainController.php
Line: 133
Function: frontLayout
File: /home2/teamagsf/public_html/index.php
Line: 316
Function: require_once
A PHP Error was encountered
Severity: Warning
Message: Trying to access array offset on value of type null
Filename: front_pages/news_single.php
Line Number: 183
Backtrace:
File: /home2/teamagsf/public_html/application/views/front_pages/news_single.php
Line: 183
Function: _error_handler
File: /home2/teamagsf/public_html/application/core/MY_Controller.php
Line: 24
Function: view
File: /home2/teamagsf/public_html/application/controllers/FrontMainController.php
Line: 133
Function: frontLayout
File: /home2/teamagsf/public_html/index.php
Line: 316
Function: require_once
A PHP Error was encountered
Severity: Warning
Message: Trying to access array offset on value of type null
Filename: front_pages/news_single.php
Line Number: 184
Backtrace:
File: /home2/teamagsf/public_html/application/views/front_pages/news_single.php
Line: 184
Function: _error_handler
File: /home2/teamagsf/public_html/application/core/MY_Controller.php
Line: 24
Function: view
File: /home2/teamagsf/public_html/application/controllers/FrontMainController.php
Line: 133
Function: frontLayout
File: /home2/teamagsf/public_html/index.php
Line: 316
Function: require_once
A PHP Error was encountered
Severity: Warning
Message: Trying to access array offset on value of type null
Filename: front_pages/news_single.php
Line Number: 187
Backtrace:
File: /home2/teamagsf/public_html/application/views/front_pages/news_single.php
Line: 187
Function: _error_handler
File: /home2/teamagsf/public_html/application/core/MY_Controller.php
Line: 24
Function: view
File: /home2/teamagsf/public_html/application/controllers/FrontMainController.php
Line: 133
Function: frontLayout
File: /home2/teamagsf/public_html/index.php
Line: 316
Function: require_once
A PHP Error was encountered
Severity: Warning
Message: Trying to access array offset on value of type null
Filename: front_pages/news_single.php
Line Number: 208
Backtrace:
File: /home2/teamagsf/public_html/application/views/front_pages/news_single.php
Line: 208
Function: _error_handler
File: /home2/teamagsf/public_html/application/core/MY_Controller.php
Line: 24
Function: view
File: /home2/teamagsf/public_html/application/controllers/FrontMainController.php
Line: 133
Function: frontLayout
File: /home2/teamagsf/public_html/index.php
Line: 316
Function: require_once
A PHP Error was encountered
Severity: 8192
Message: json_decode(): Passing null to parameter #1 ($json) of type string is deprecated
Filename: front_pages/news_single.php
Line Number: 208
Backtrace:
File: /home2/teamagsf/public_html/application/views/front_pages/news_single.php
Line: 208
Function: json_decode
File: /home2/teamagsf/public_html/application/core/MY_Controller.php
Line: 24
Function: view
File: /home2/teamagsf/public_html/application/controllers/FrontMainController.php
Line: 133
Function: frontLayout
File: /home2/teamagsf/public_html/index.php
Line: 316
Function: require_once
A PHP Error was encountered
Severity: Warning
Message: Trying to access array offset on value of type null
Filename: front_pages/news_single.php
Line Number: 239
Backtrace:
File: /home2/teamagsf/public_html/application/views/front_pages/news_single.php
Line: 239
Function: _error_handler
File: /home2/teamagsf/public_html/application/core/MY_Controller.php
Line: 24
Function: view
File: /home2/teamagsf/public_html/application/controllers/FrontMainController.php
Line: 133
Function: frontLayout
File: /home2/teamagsf/public_html/index.php
Line: 316
Function: require_once
-

Hi there, I read your blogs regularly. Your writing style is awesome, keep up the good work!
leave a reply
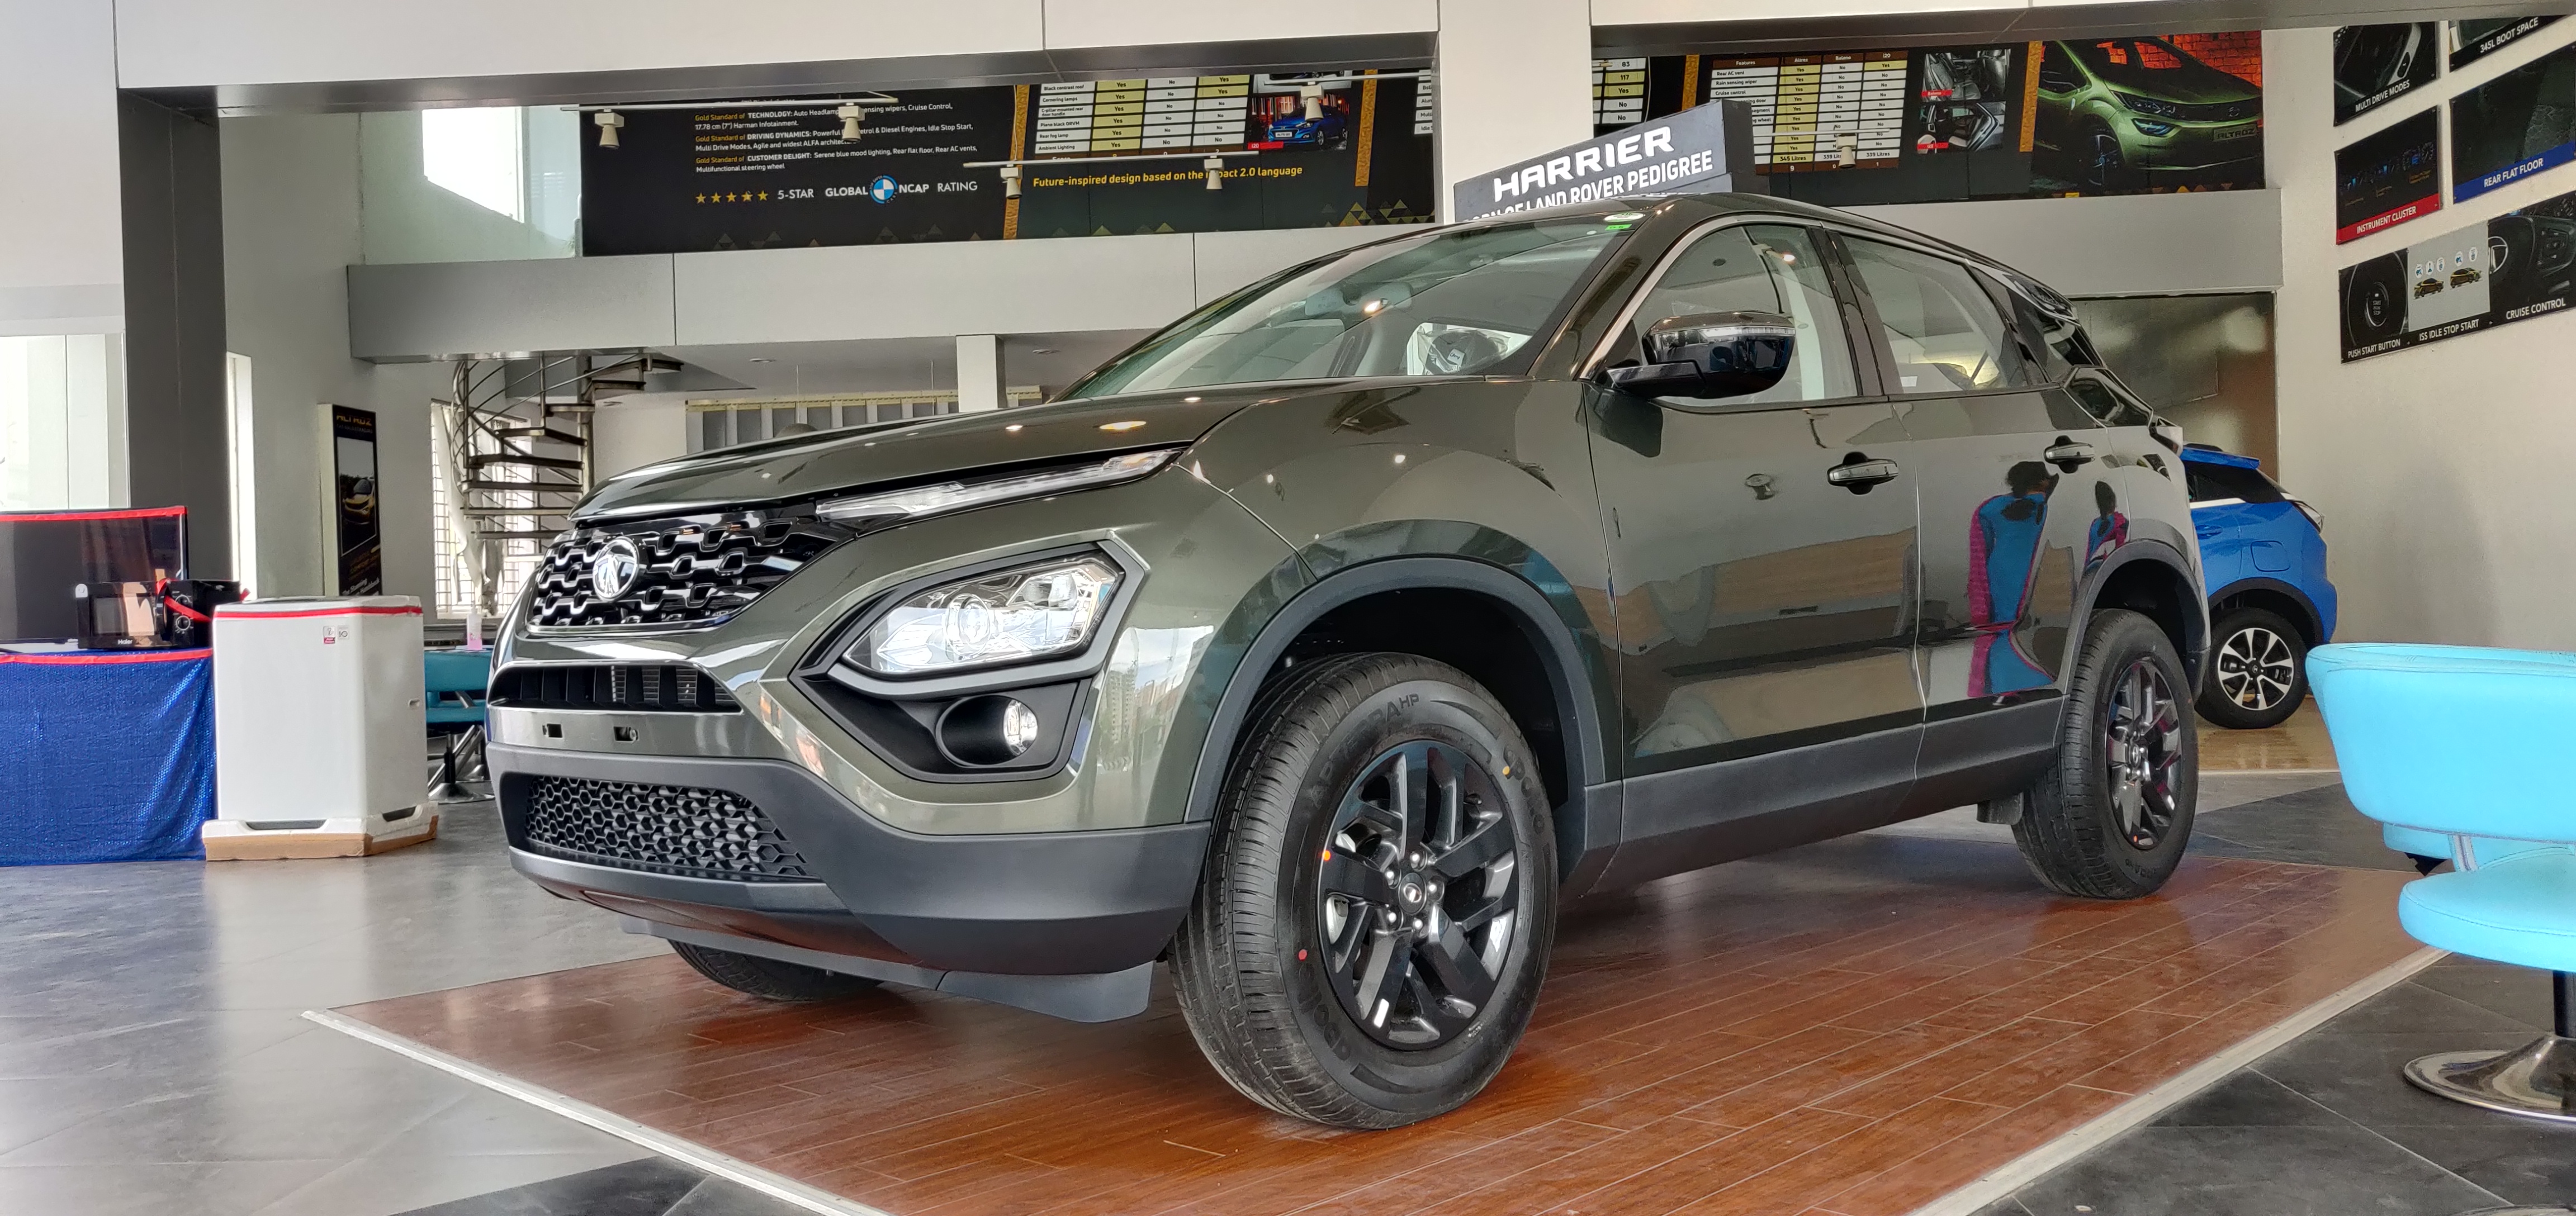
Related News

-
90/100 Osram headlamp bulbs
-
VW type trumpet horn (Hella)
-
White LED cabin light
-
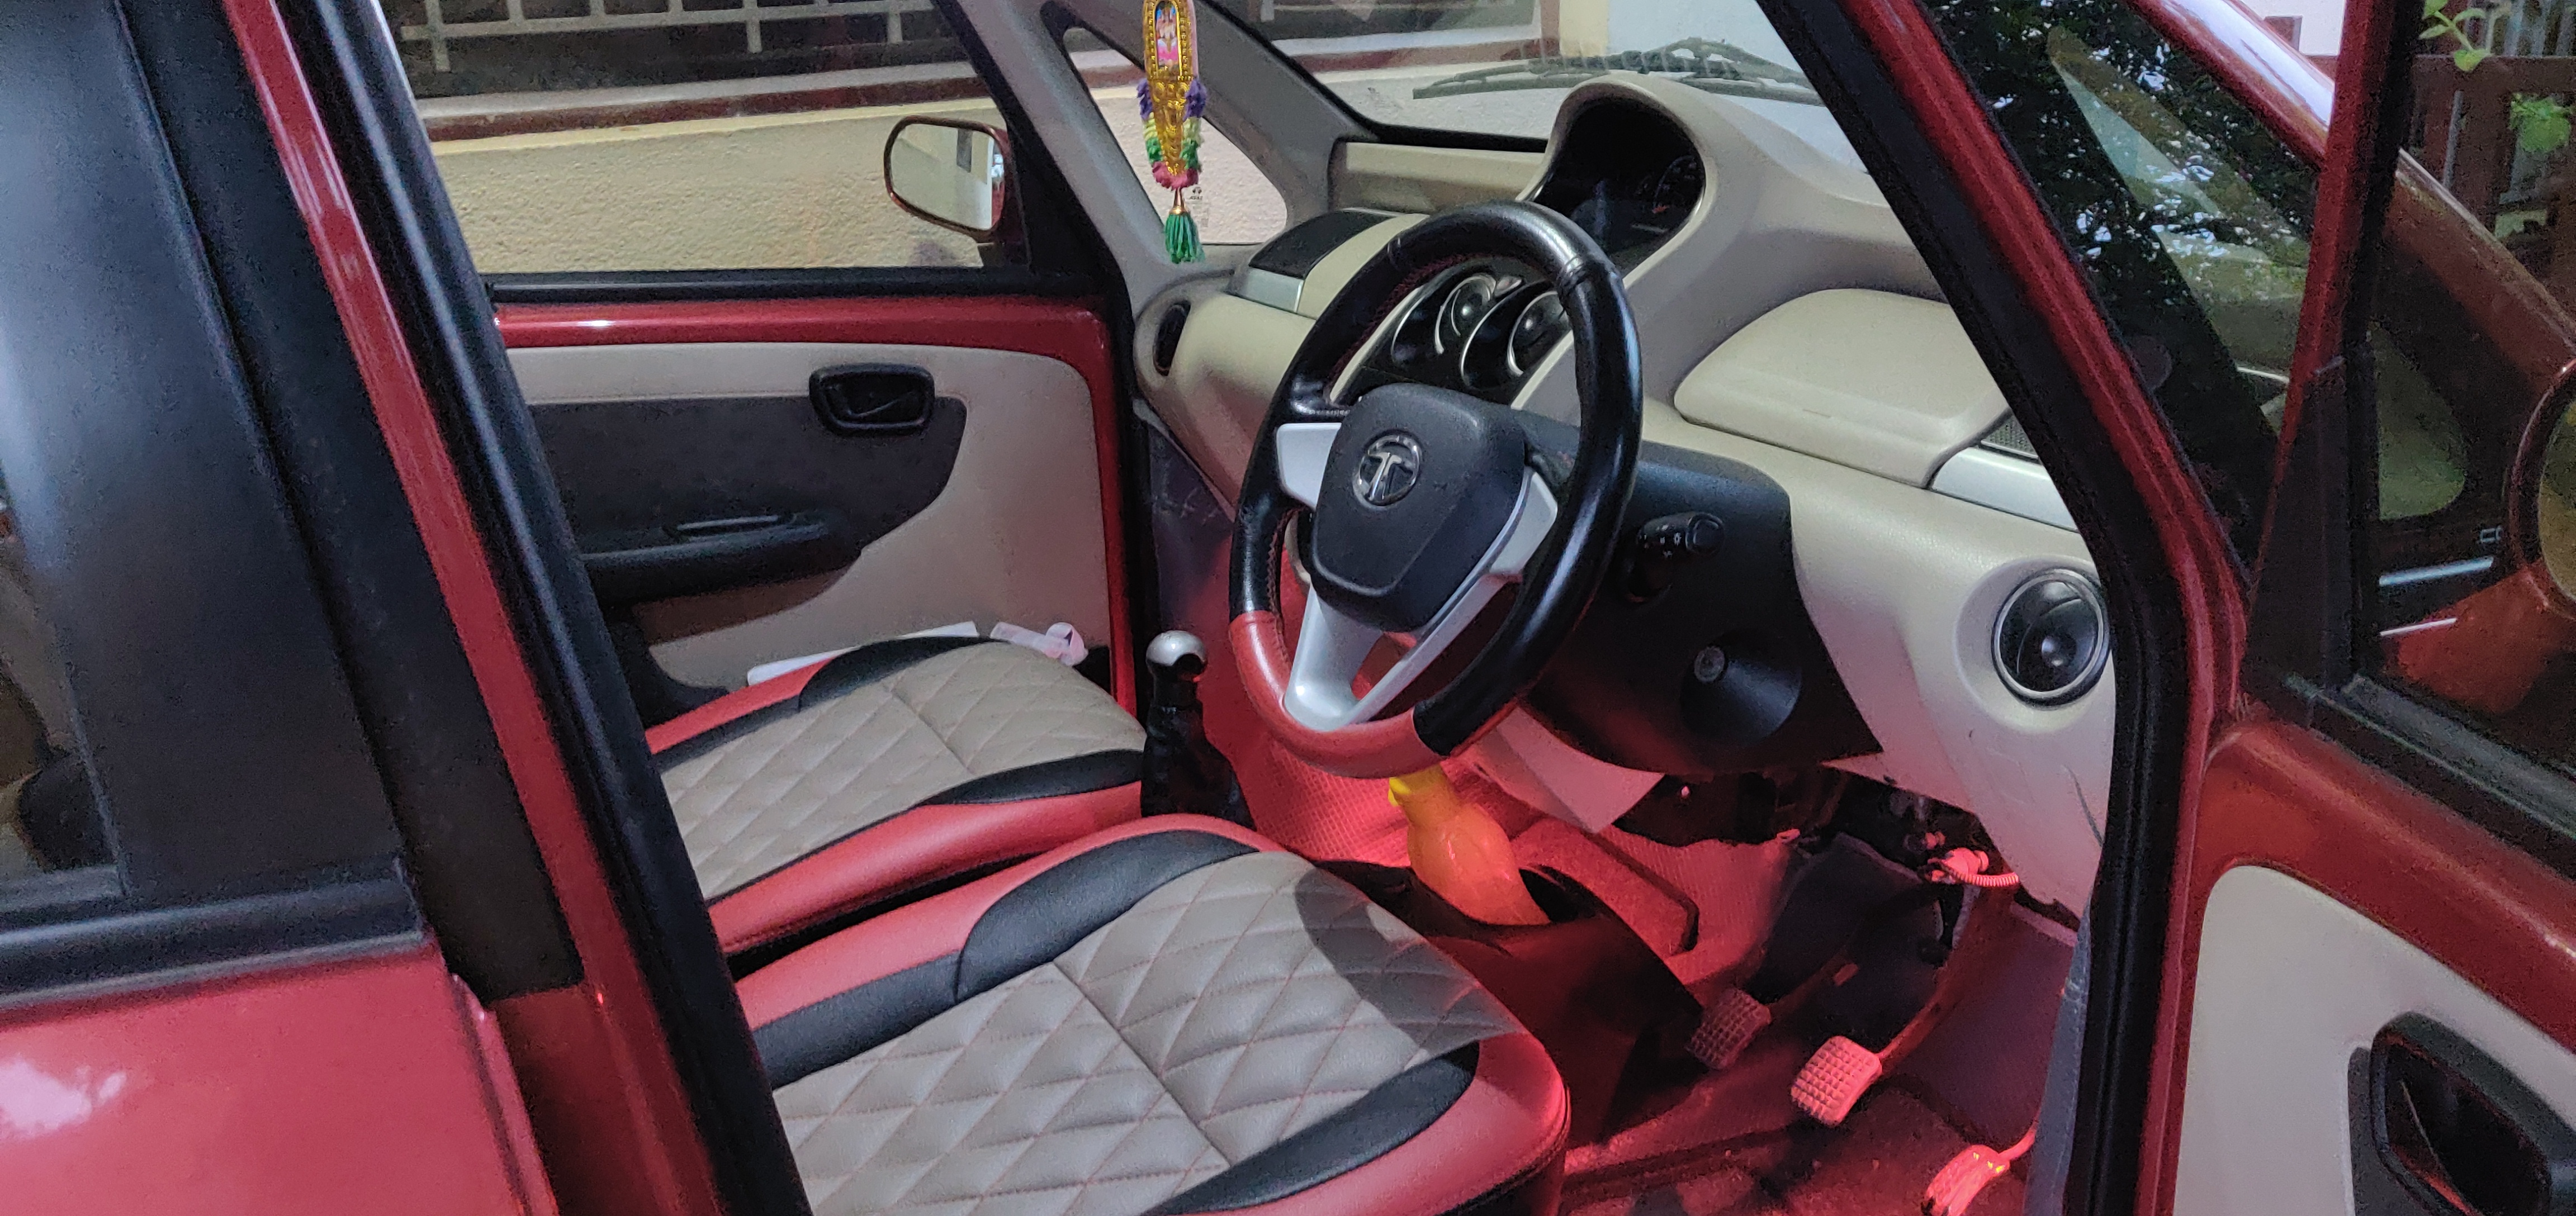
Seat covers with improved driver seat comfort
-
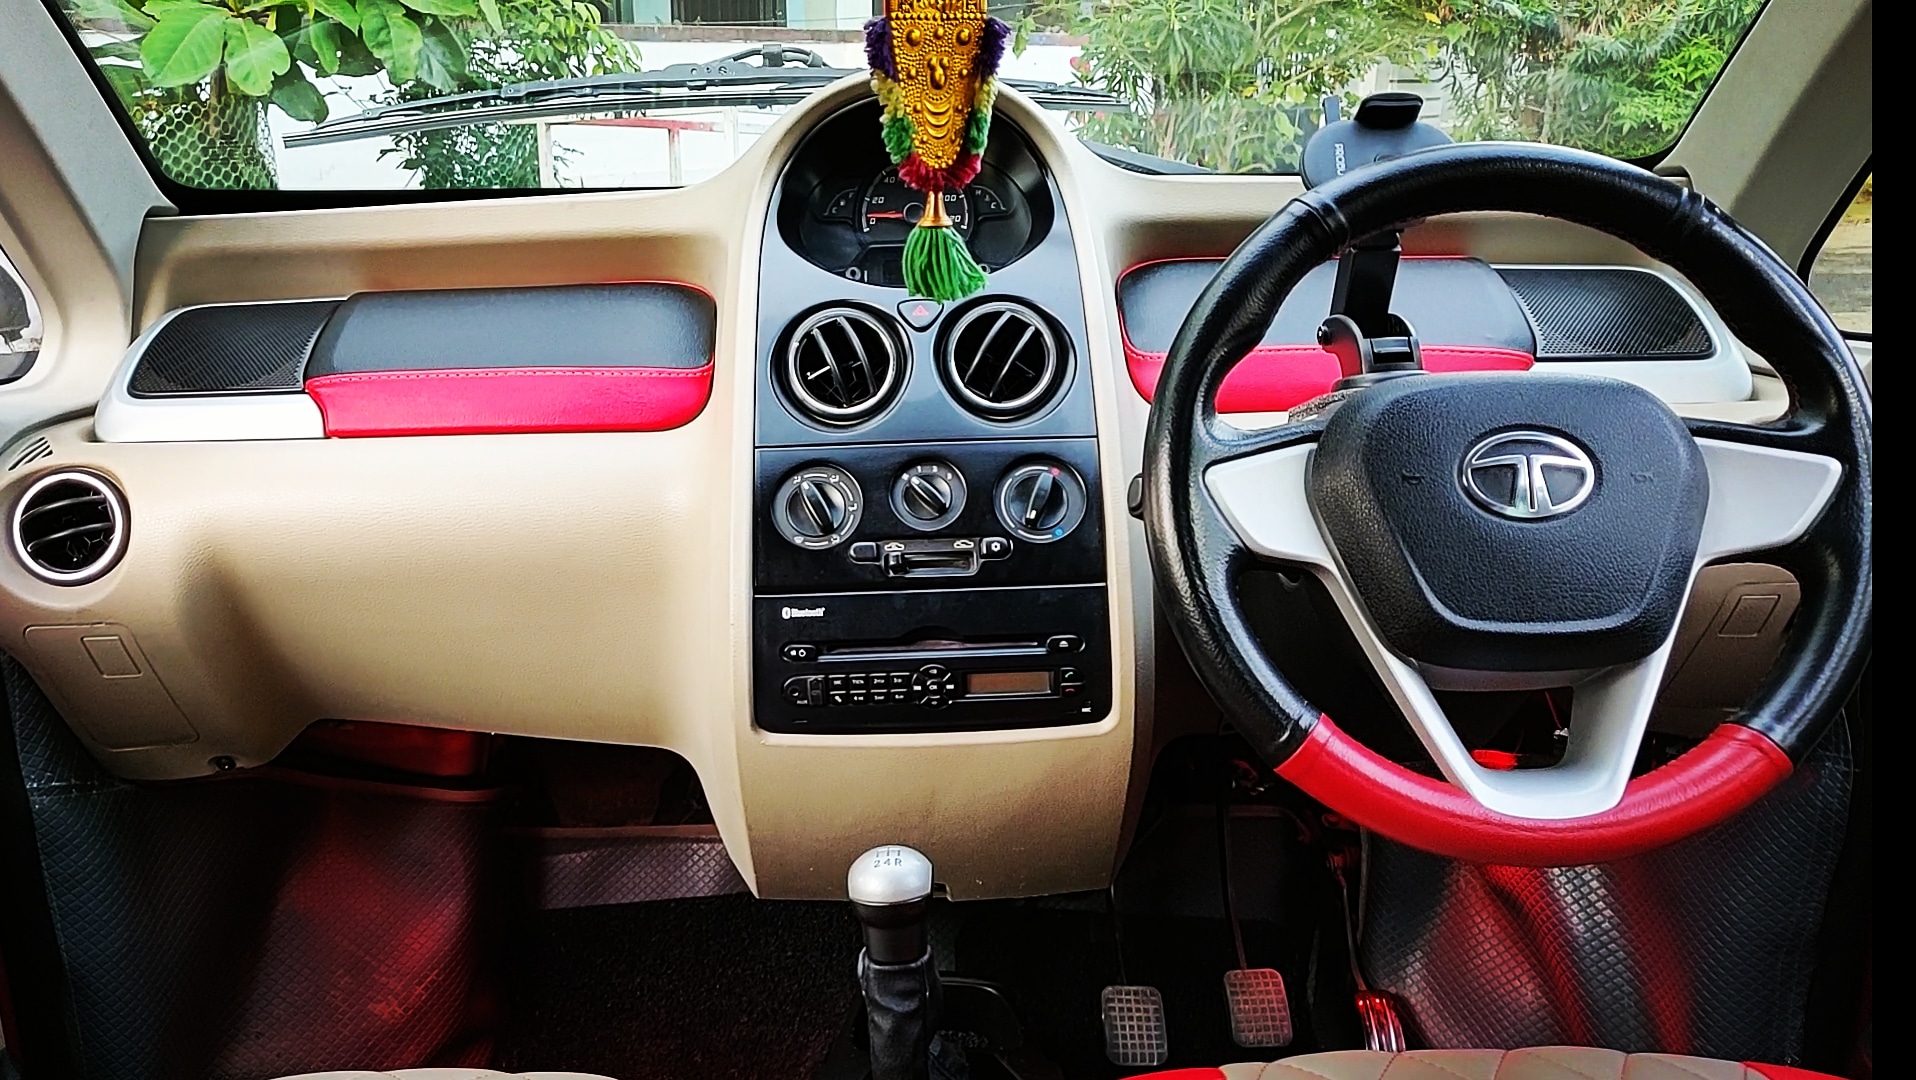
Interior ambient red lighting.
-
Road noise is non-existent
-
Ground clearance increased by 15mm approx
-
Grip is excellent
-
Braking feels improved, although needs slightly more effort.
-
Ride quality significantly improved
-
Feels confident at higher speeds
-
Increased body roll
-
Front mud flaps can’t be fitted
-
Fuel economy reduced by approx 0.2kmpl
-
Speedo error of -3kmph
-
LED DRLs with 3 way switch
-
Black roof and door sills
-
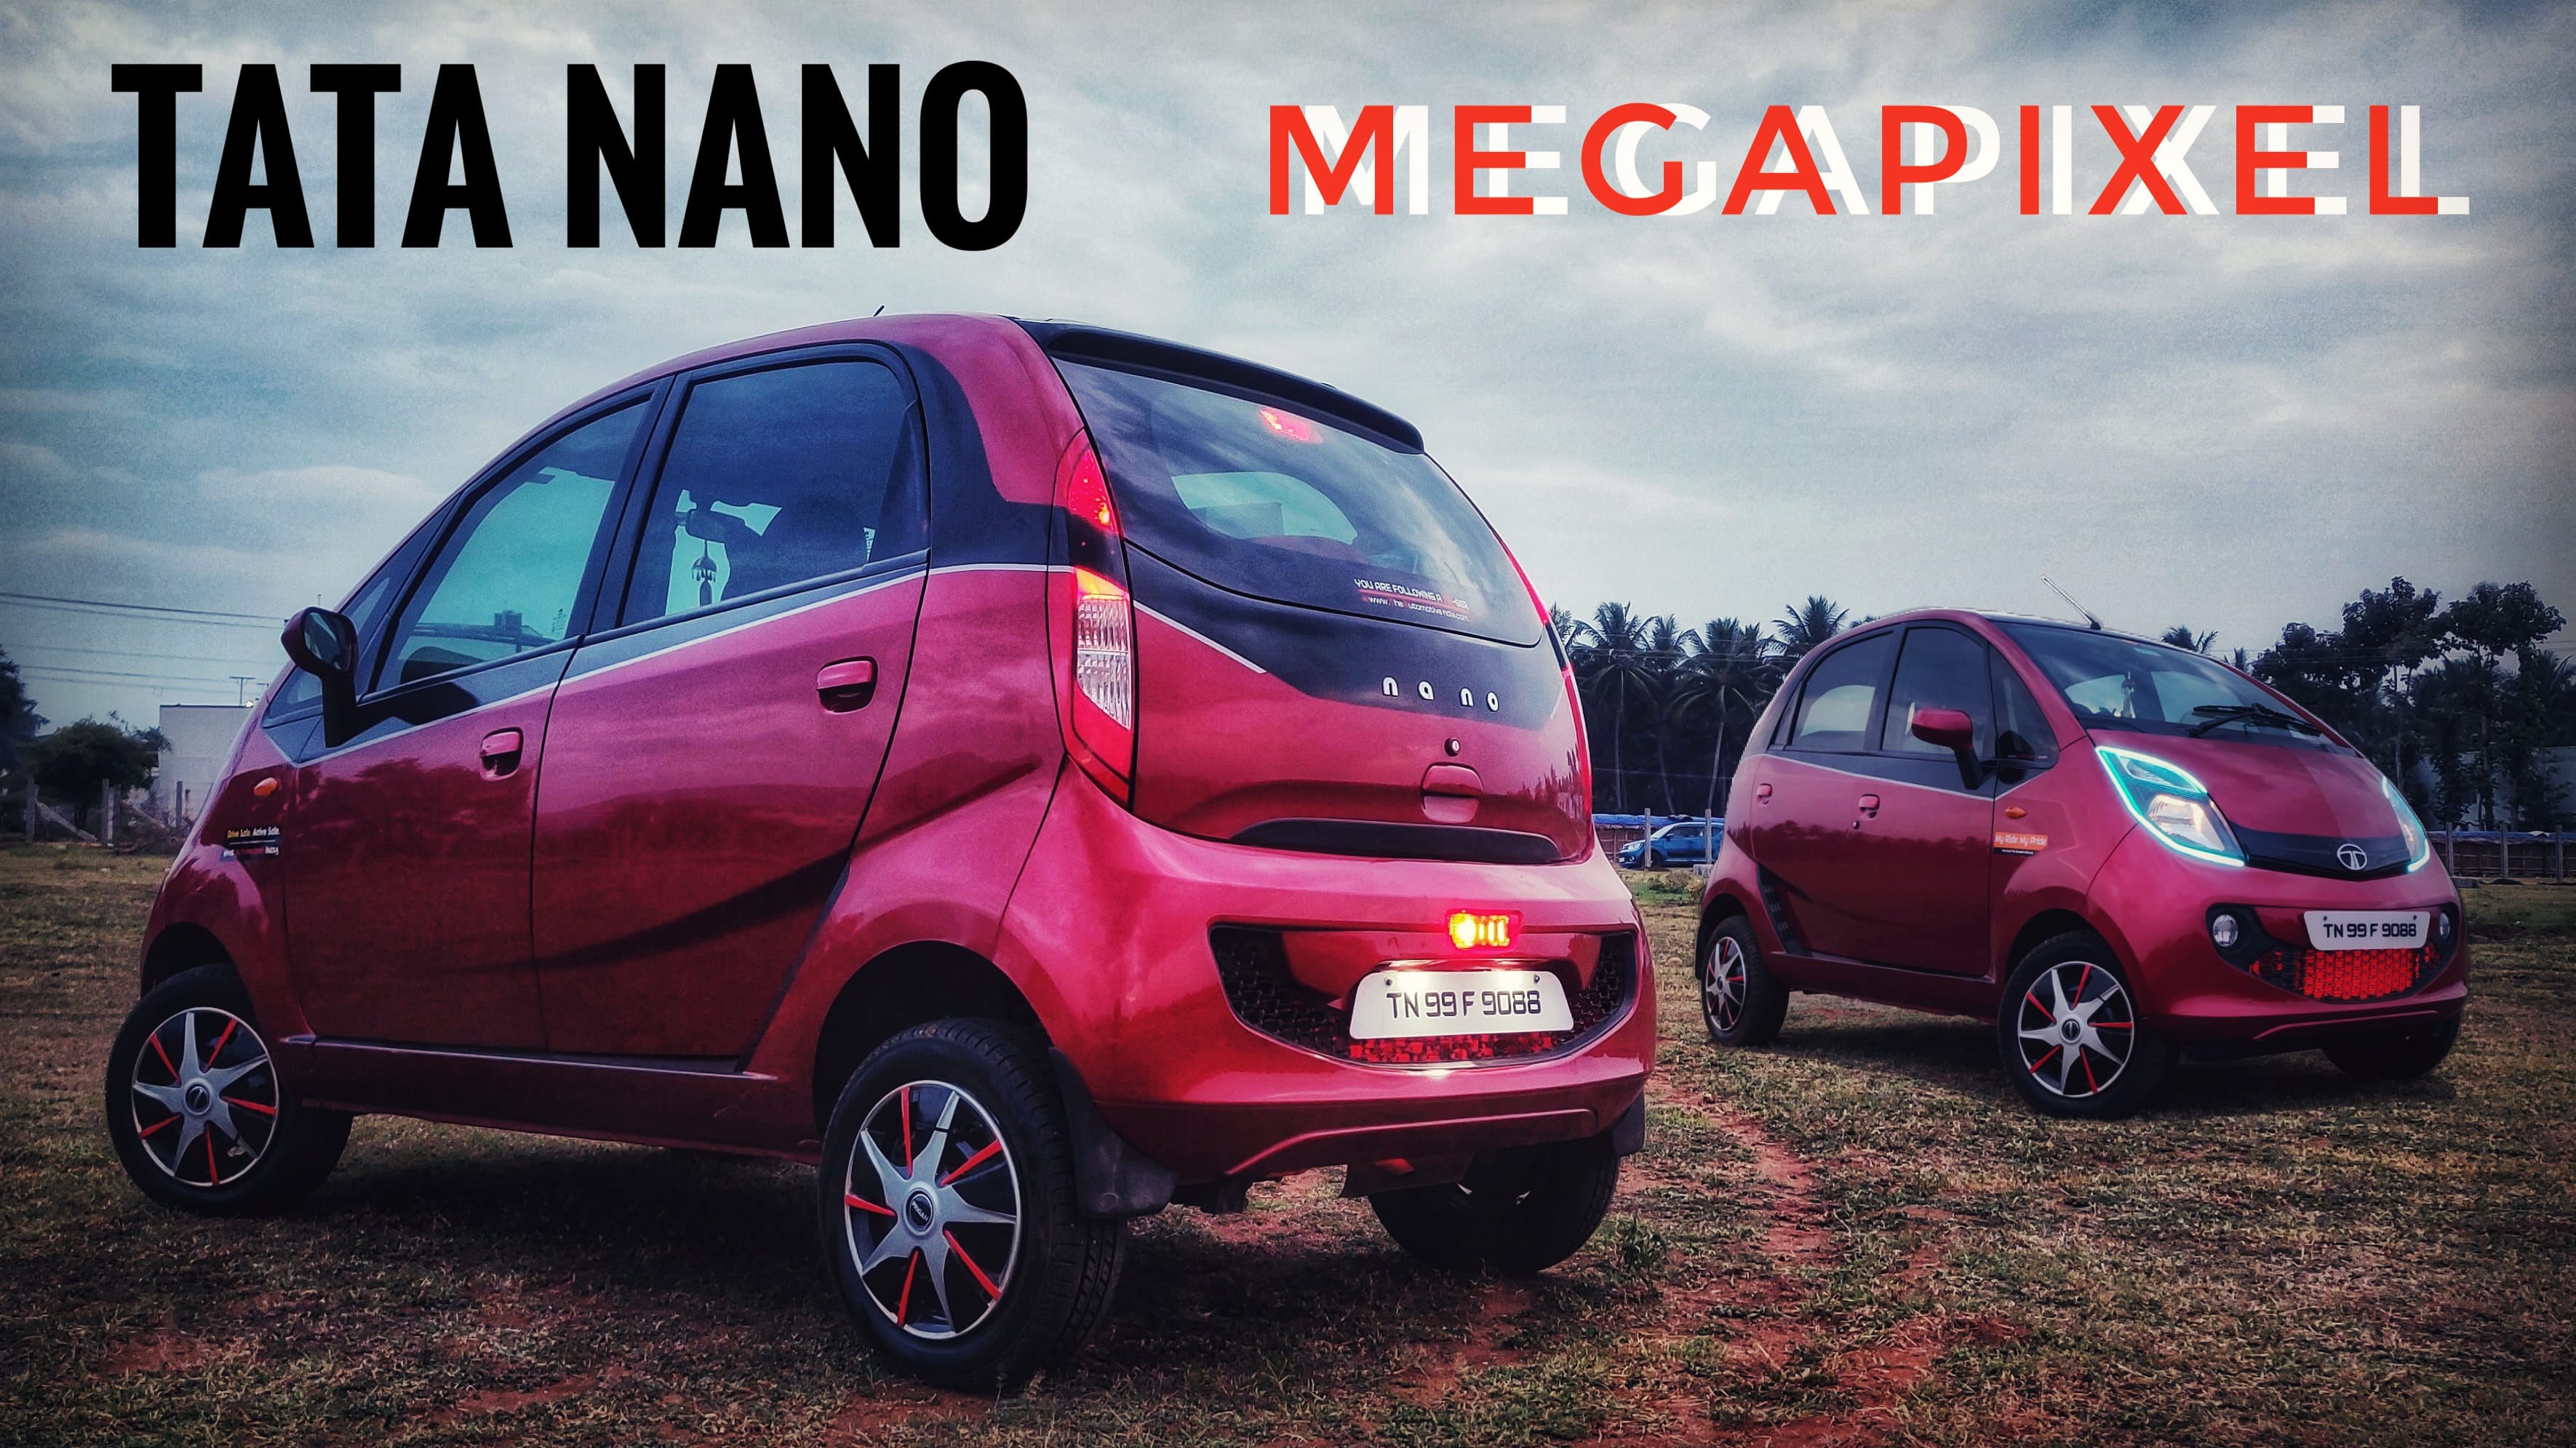
Megapixel front makeover
-
Dashboard leather wrap
-
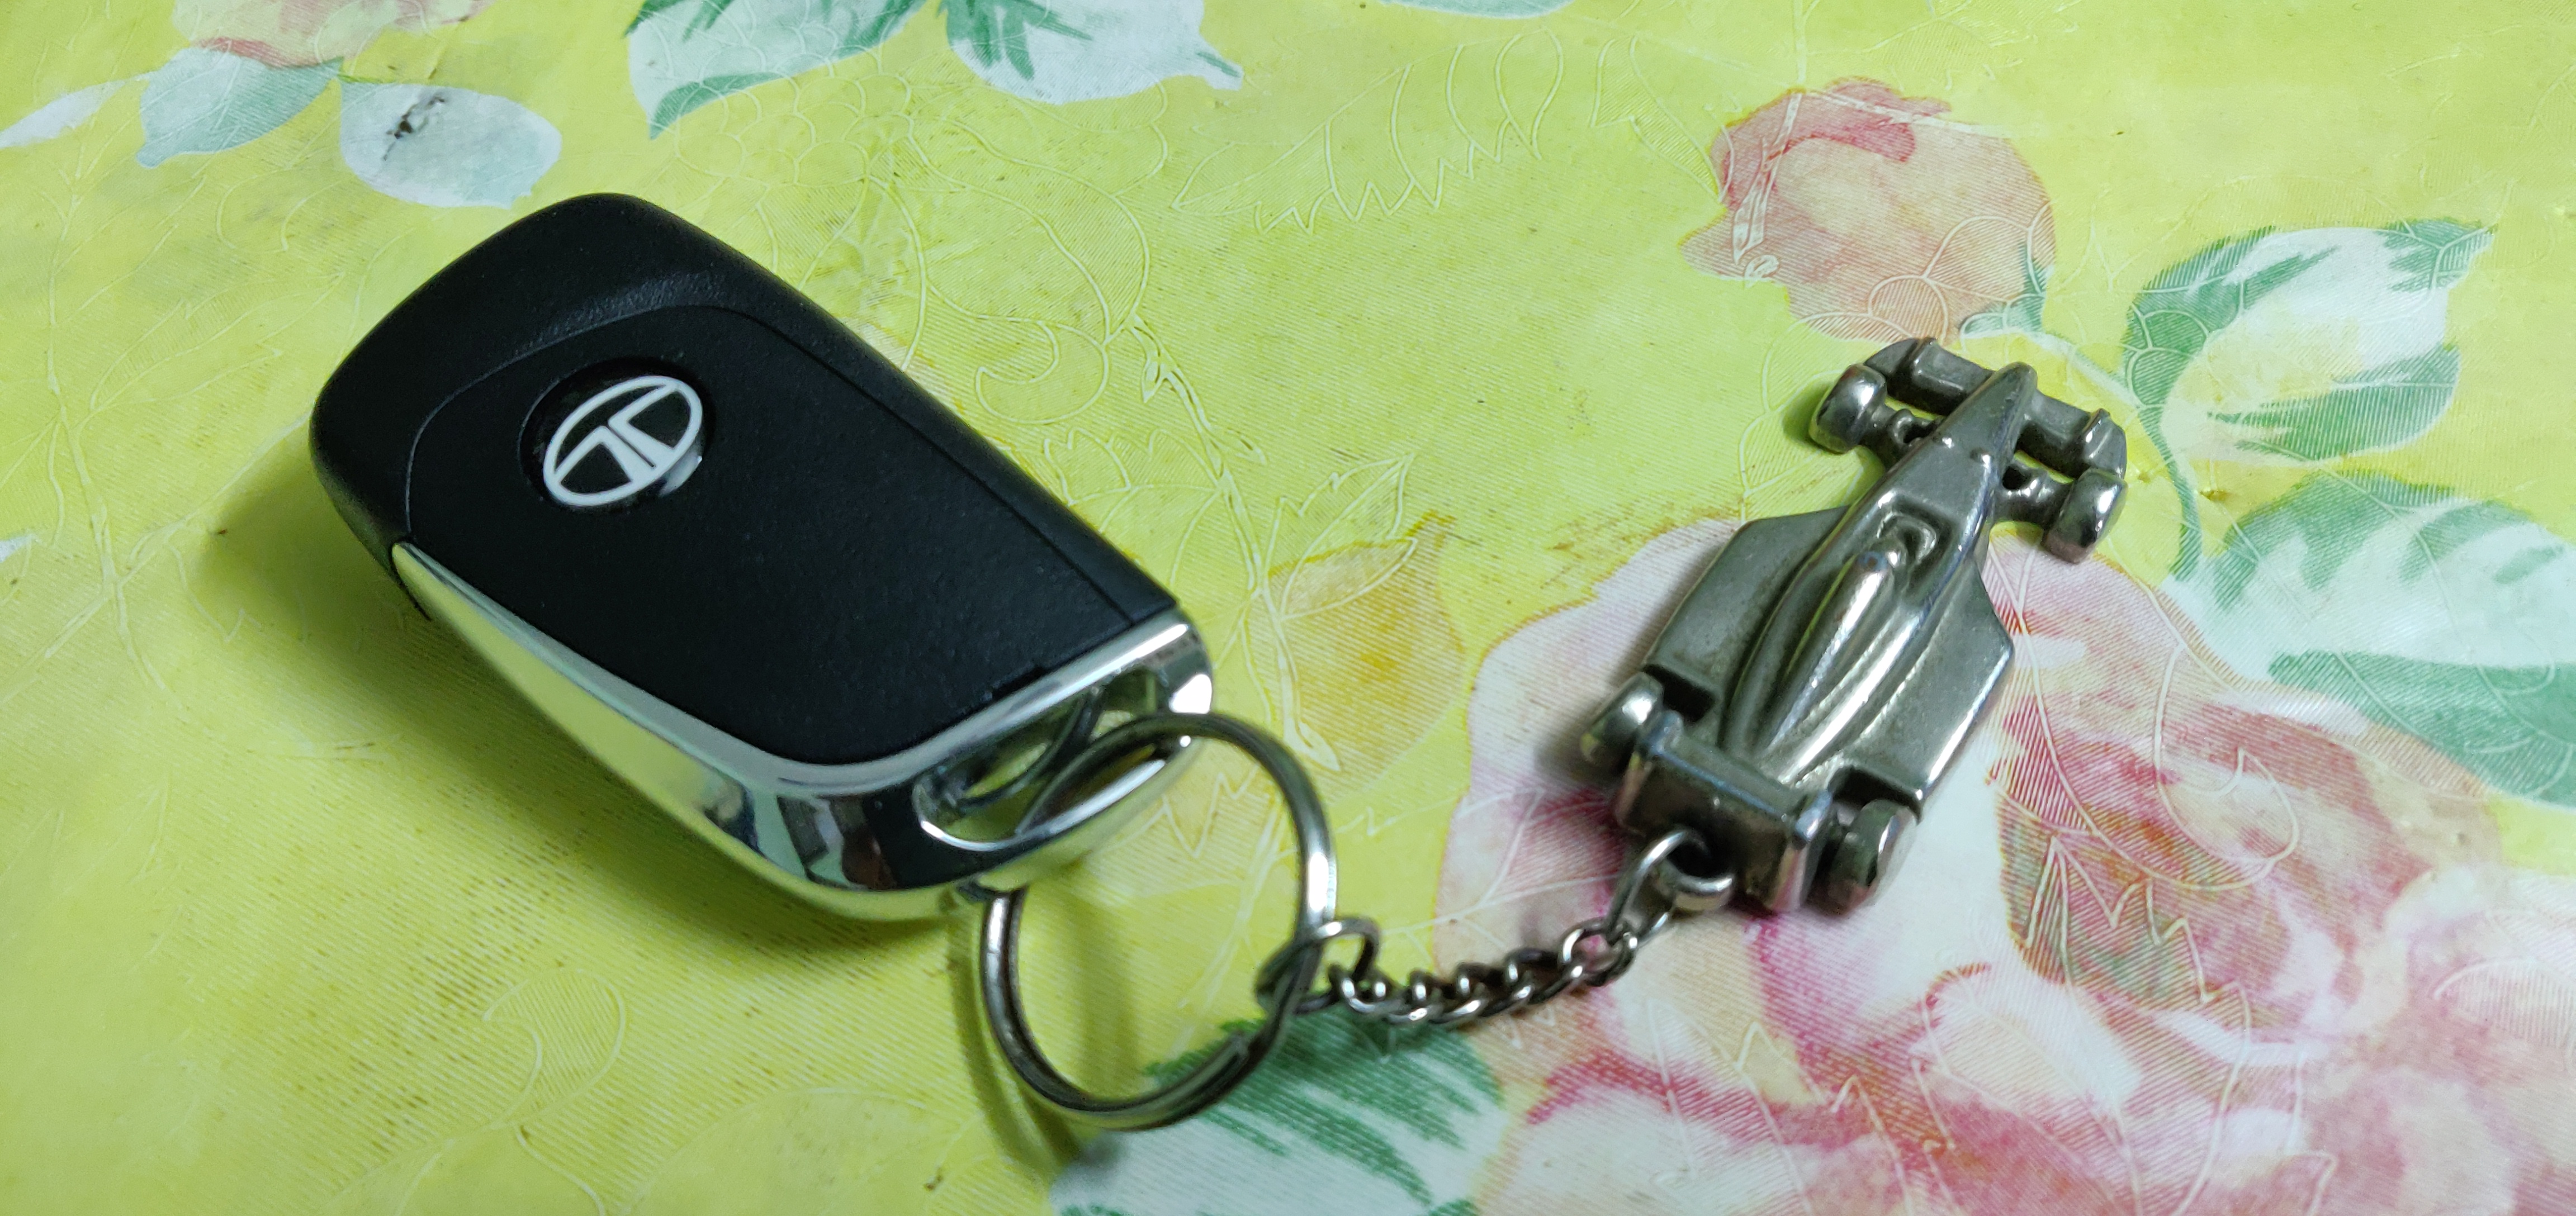
Flip key
-
The first point will keep them always ON irrespective of locking the car.
-
The second point is the total OFF position.
-
The third point is connected to the Nano’s central locking and doors and they work like follow me lights. Unlocking the car/opening the door turns them on and locking the car/starting the engine turns them off. Since they are connected to the interior cabin lamp, they too have a theatre dimming function which looks absolutely cool! I loved it!
-
AC
-
Power steering
-
Power windows
-
Central locking
-
16” Steel wheels
-
Reverse sensors
-
Steel footsteps
-
Mechanical Diff lock 4x4
-
Fixed soft top
-
6 seats (the side facing rear seats)
-
Remote locking
-
Forward-facing rear seats
-
ISOFIX child seat mounts
-
Height adjustable driver seat
-
18” alloy wheels
-
Front fog lamps
-
LED DRLs
-
Electric ORVMs
-
Driver seat lumbar adjust
-
TFT instrument cluster
-
7” touchscreen system
-
4 roof-mounted speakers
-
Android Auto & Apple car play
-
Adventure stats and Tyre direction assist
-
Electronic AC controls
-
Cruise control
-
4 seats
-
Convertible or Hardtop
-
Moulded footsteps
-
Brake locking differential
-
ABS with EBD
-
Dual airbags
-
ISOFIX child seat mounts (only on 4 seaters)
-
Pretensioner seatbelts
-
Engine immobilizer
-
Hill hold assist
-
ESP with traction control
-
Tyre pressure monitoring system

Toyota is all set to launch the Innova Crysta Facelift in India. The expected launch date will be on November 20, 2020. Already few dealerships started accepting a booking. The new photos have surfaced of this updated model from Indonesia. Here are some key highlights of this new model.

Exterior
While the overall dimensions remain exactly the same, the facelift model will feature an all-new front grille finished in glossy black with five slats while the outer portion of the grille sports chrome finishing
The bumper has also been made to resemble an SUV and looks beefier with a faux skid plate. The fog lamps are located lower down in the bumper on the lower variants whereas the higher variants get LED DRLs integrated with the fog lamps on the regular location. There are no major changes on the sides except for the new dual-tone Alloy wheels. The rear too looks exactly the same except for minor changes in the tail lamps.
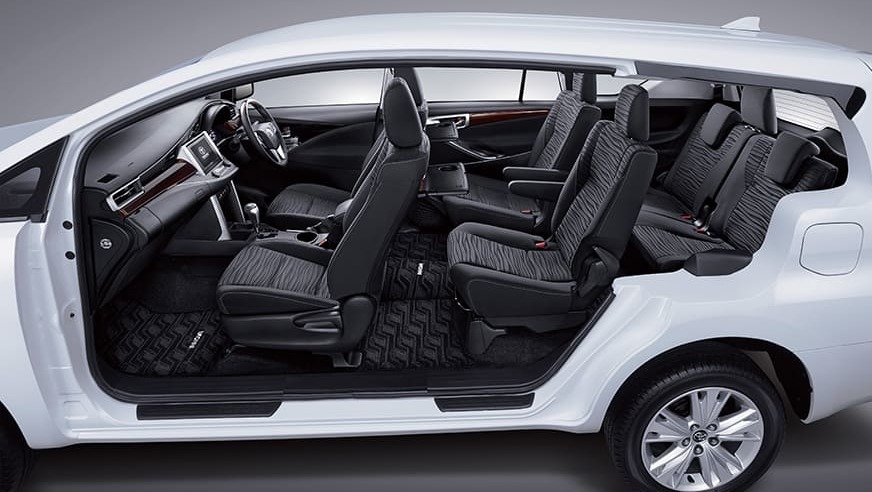
Interior
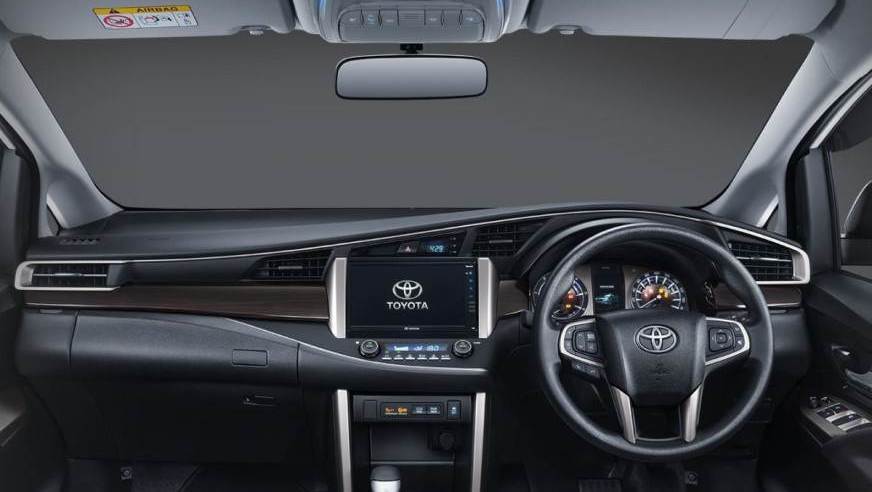
The interior of the new Crysta offers a new larger infotainment system which is expected to feature Android Auto and Apple car play. The Indian version is expected to receive a different faux wood treatment as well. Apart from these changes, the overall layout and comfort will remain the same.
Powertrain
Mechanically, no changes are expected and the updated model is expected to get the same engine options as before. The 2.4-liter 4-cylinder diesel engine mated to a 5-speed manual gearbox generates a maximum power of 150PS and maximum torque of 343NM. The 6-speed automatic-equipped diesel variants, however, generate a slightly higher torque figure of 360NM. The 2.7-litre 4-cylinder petrol engine on the other hand produces a maximum power of 167PS and Max torque of 245NM through either a 5-speed manual or 6-speed Automatic transmission.
Launch and pricing
This new facelifted Innova Crysta expected to be priced slightly higher than the outgoing models, the price could increase by Rs60000 to Rs100000. At present, the base petrol variant is available in India with an ex-showroom price tag of Rs.15.66 lakhs while the top-spec diesel variant is priced at Rs.23.63 lakhs. Stay tuned for further updates on the new Innova Crysta.
Hello everyone! Y'all may have seen the videos on my 2017 Nano GenX XT. “He” has been a gem of a companion for all of my trips and travels. Fuel costs have been just around? 1600 per month. Mind you he has run more than 33,000kms now without any squeaks or rattles.
Here's my initial 21,000km review of my stock Gen X Nano from 2019:
After running purely in stock condition for 3 years, in 2020 I decided to get my Nano modified to my unique taste. The lockdown meant that I had a
Buckle up for the journey folks!
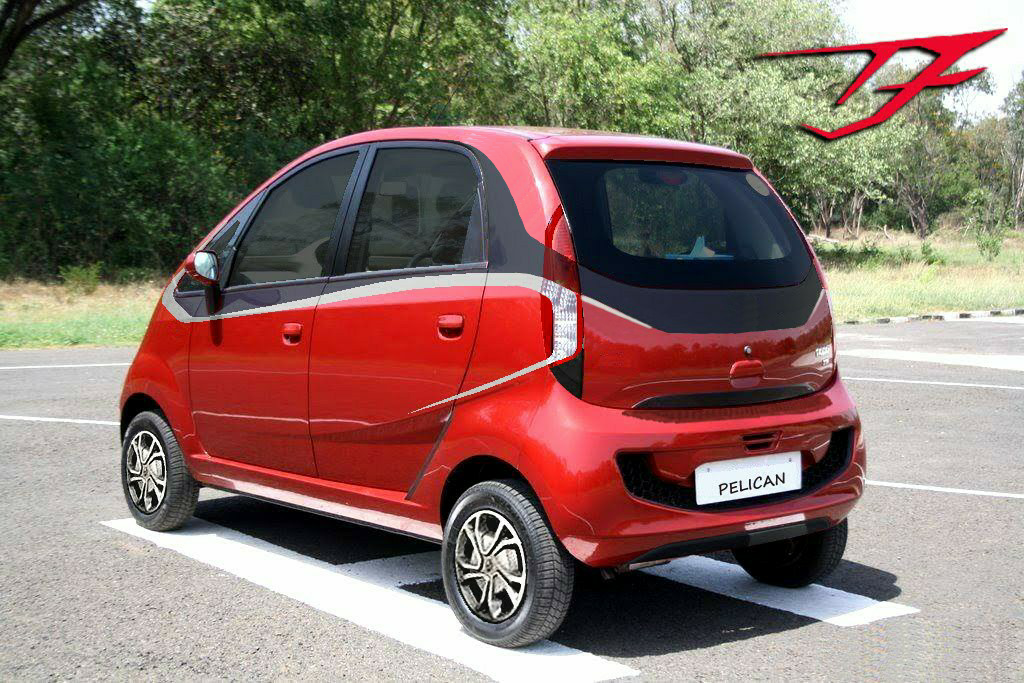
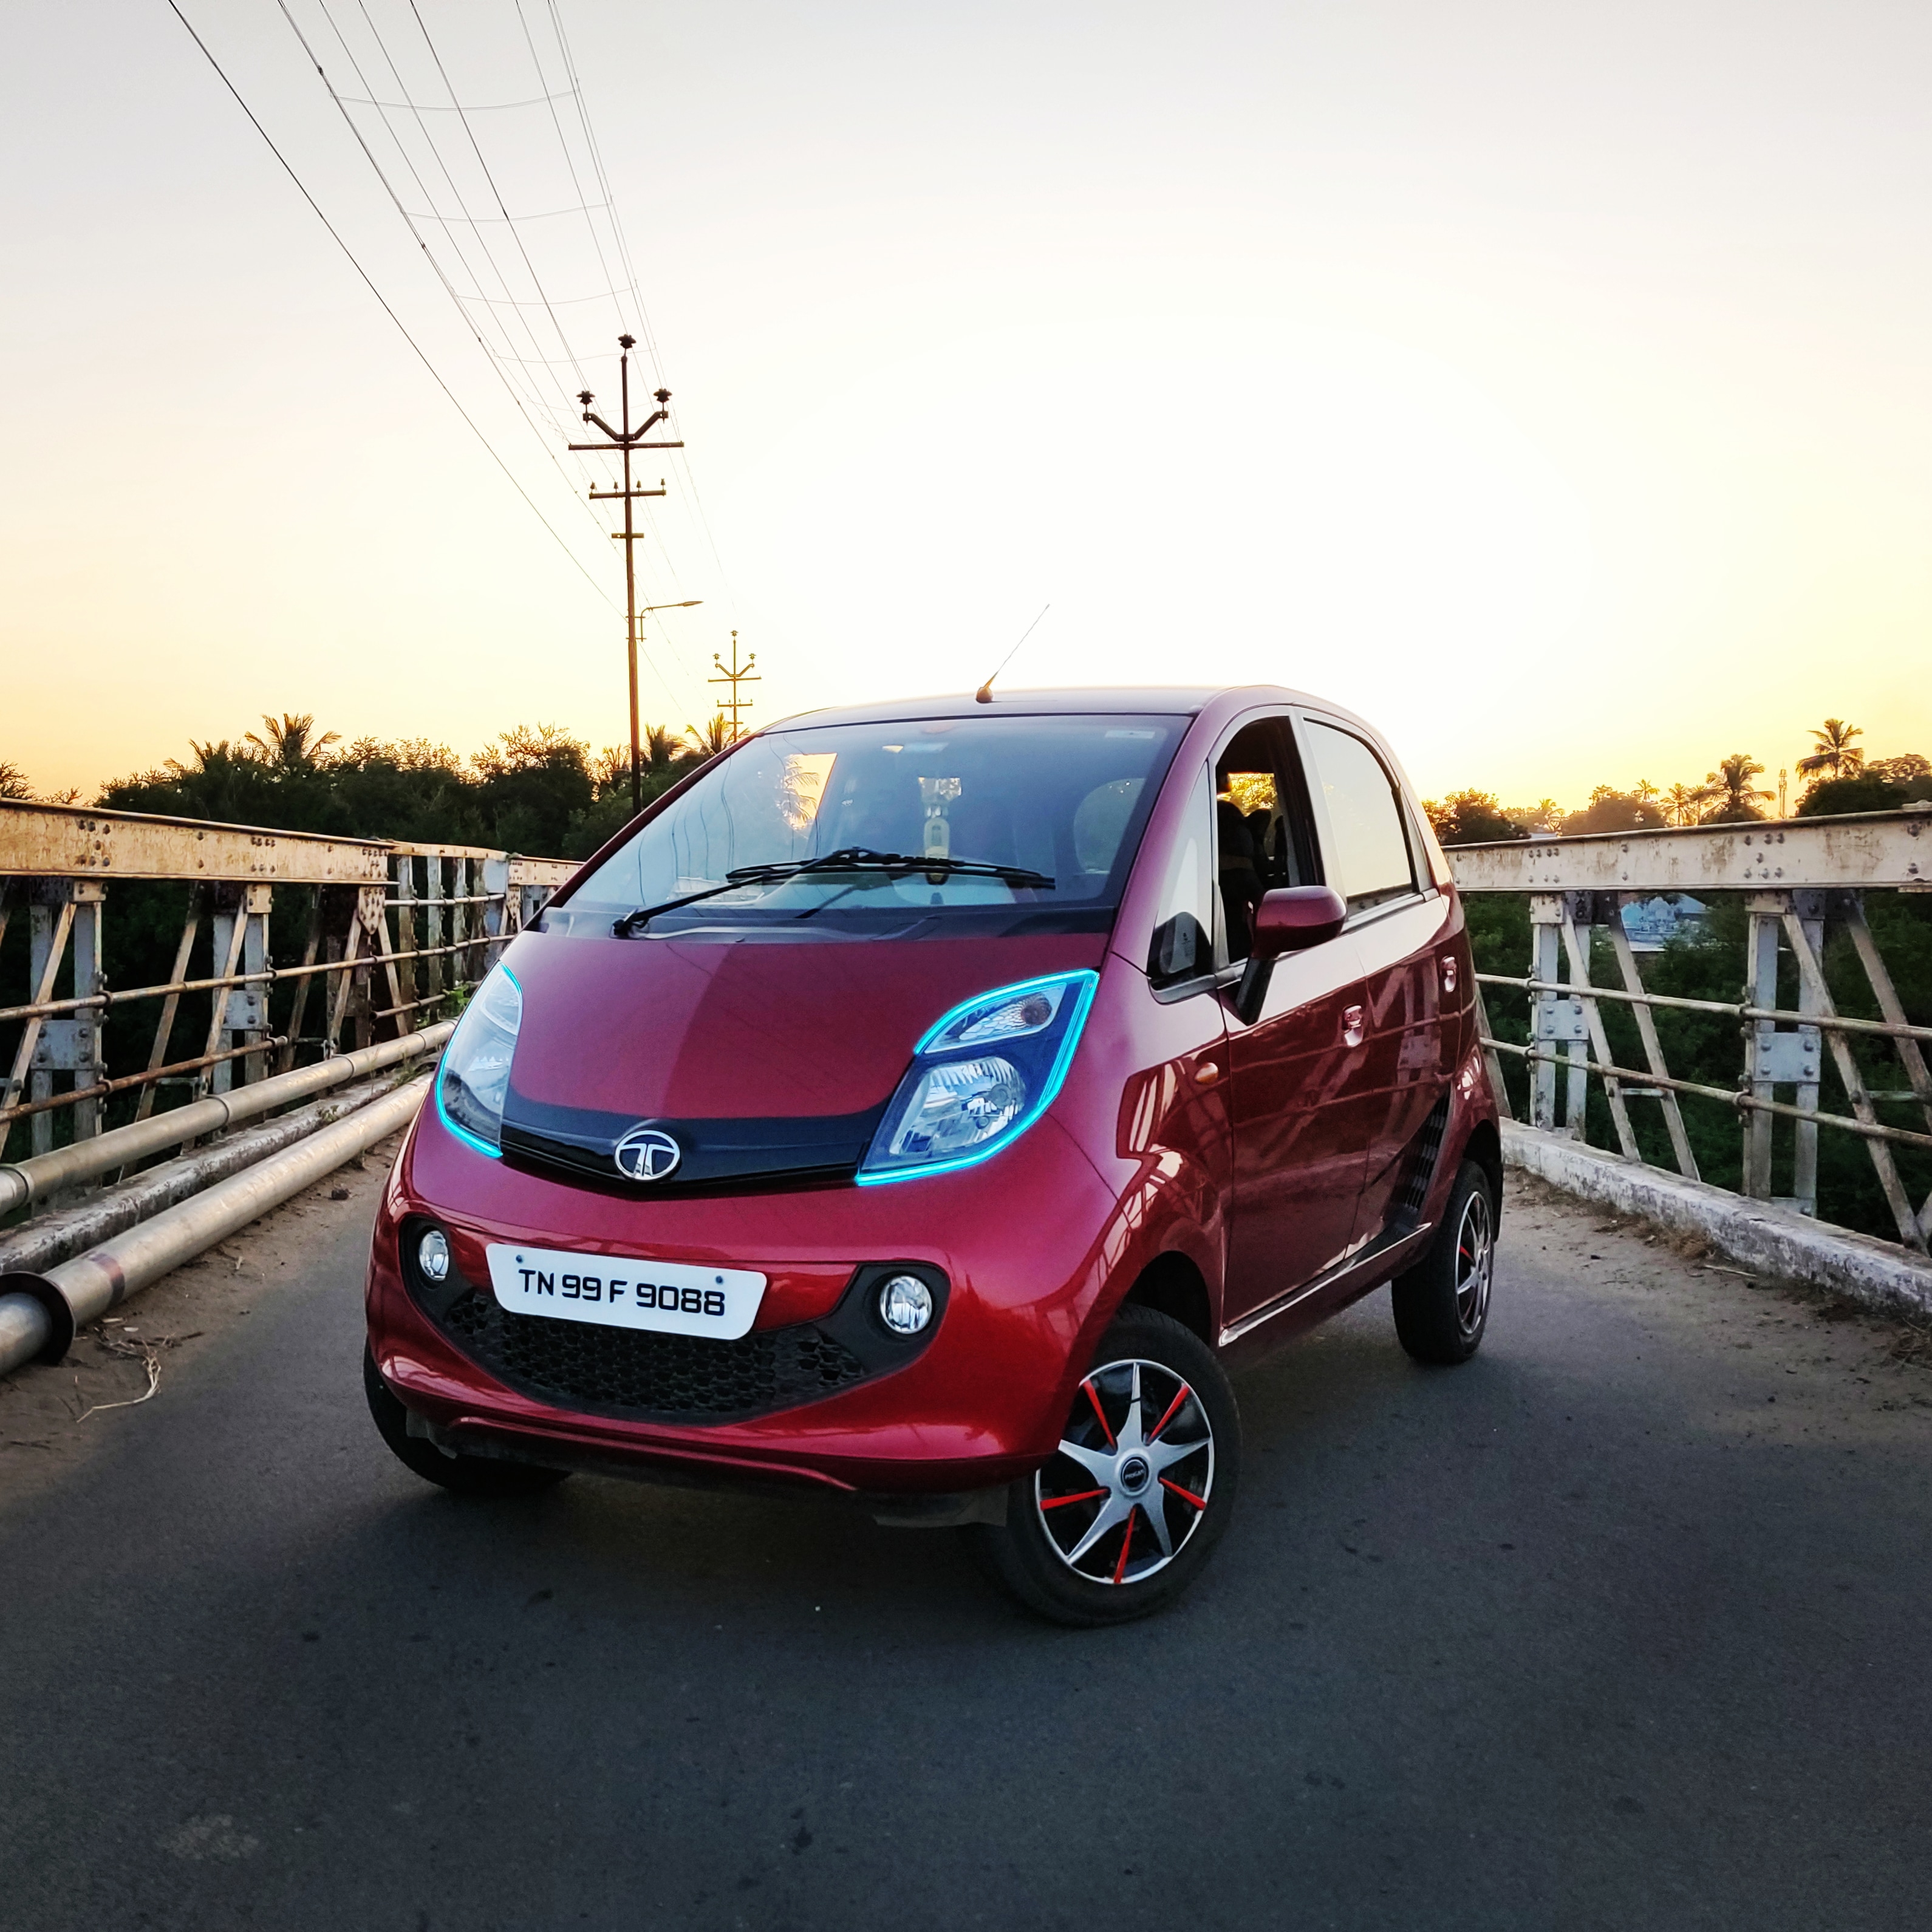
I have always been fascinated by the Megapixel concept by Tata motors. Tata was planning an improved “Pelican” (1000cc engine) version of the Nano based on this concept. The GenX was a preview of this model and sported a lot of design elements seen on this concept. So I started to plan on my modifications phase by phase.
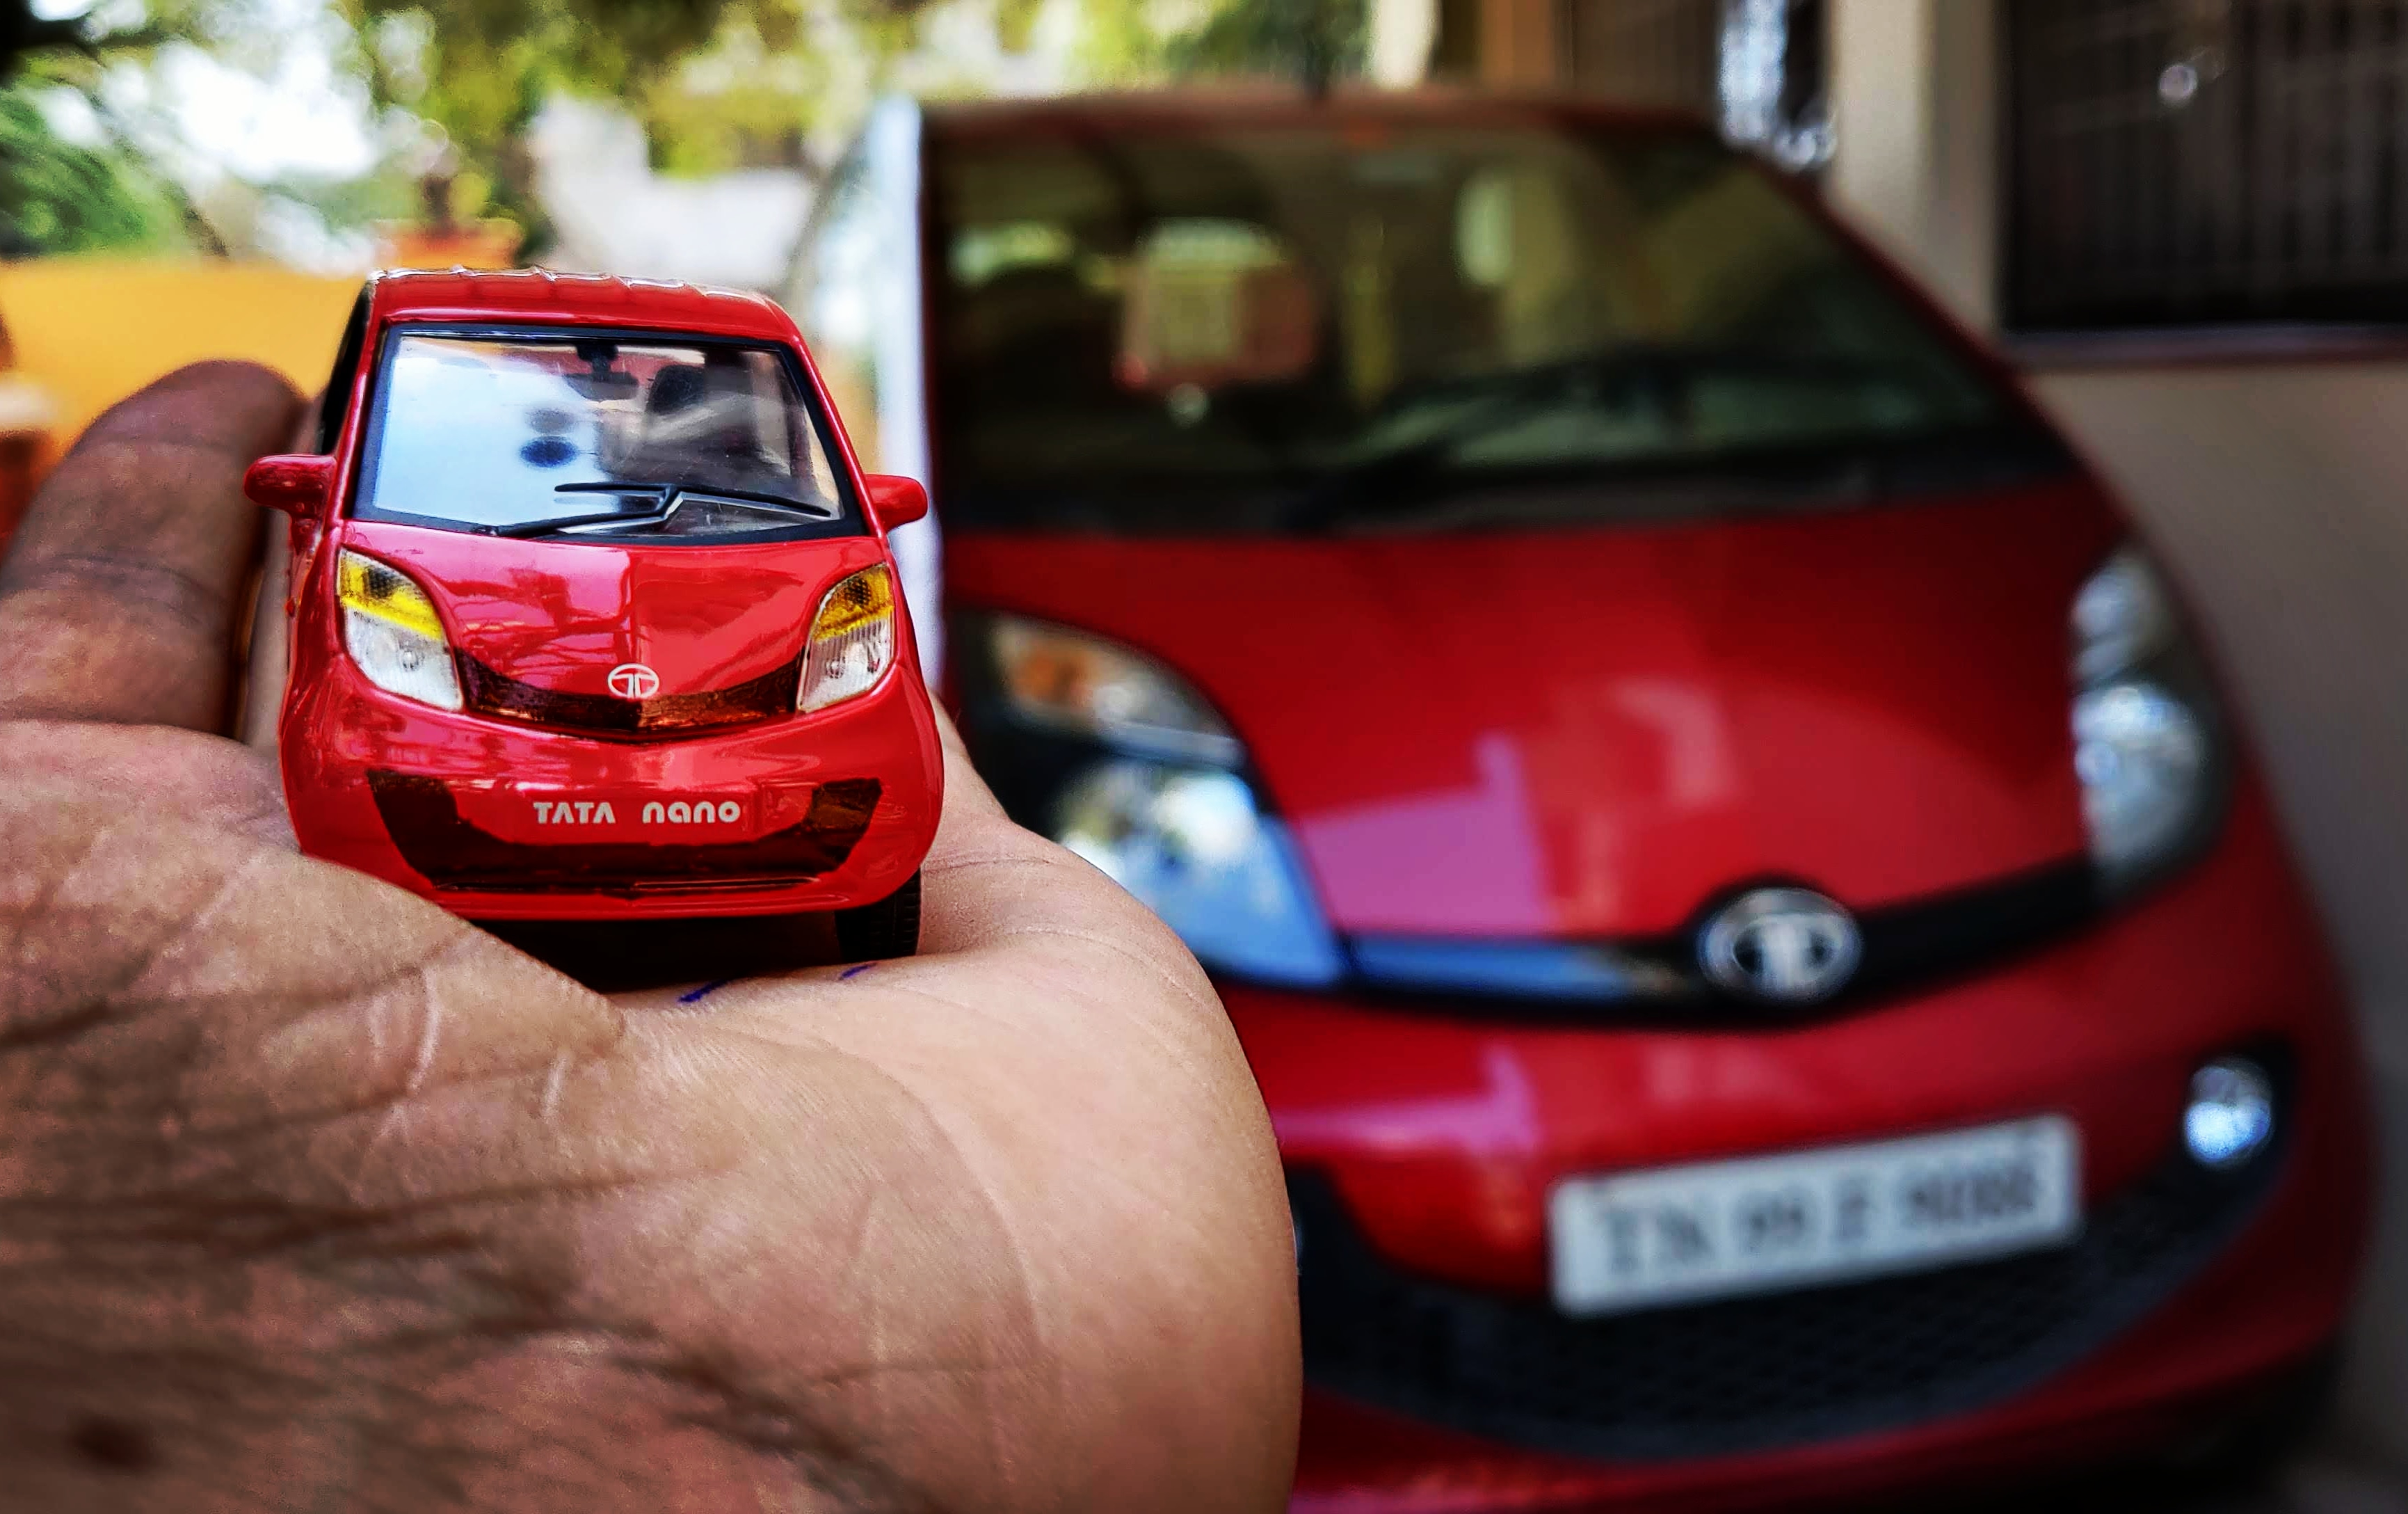
First, I bought a red Nano scale model and worked on the body decals. I previously had tried doing Photoshop renderings which looked rather good and made me seriously think of implementing this project. Since the Gen X design was already 70% based on the Megapixel concept, I decided to complete the look.
Phase 1:
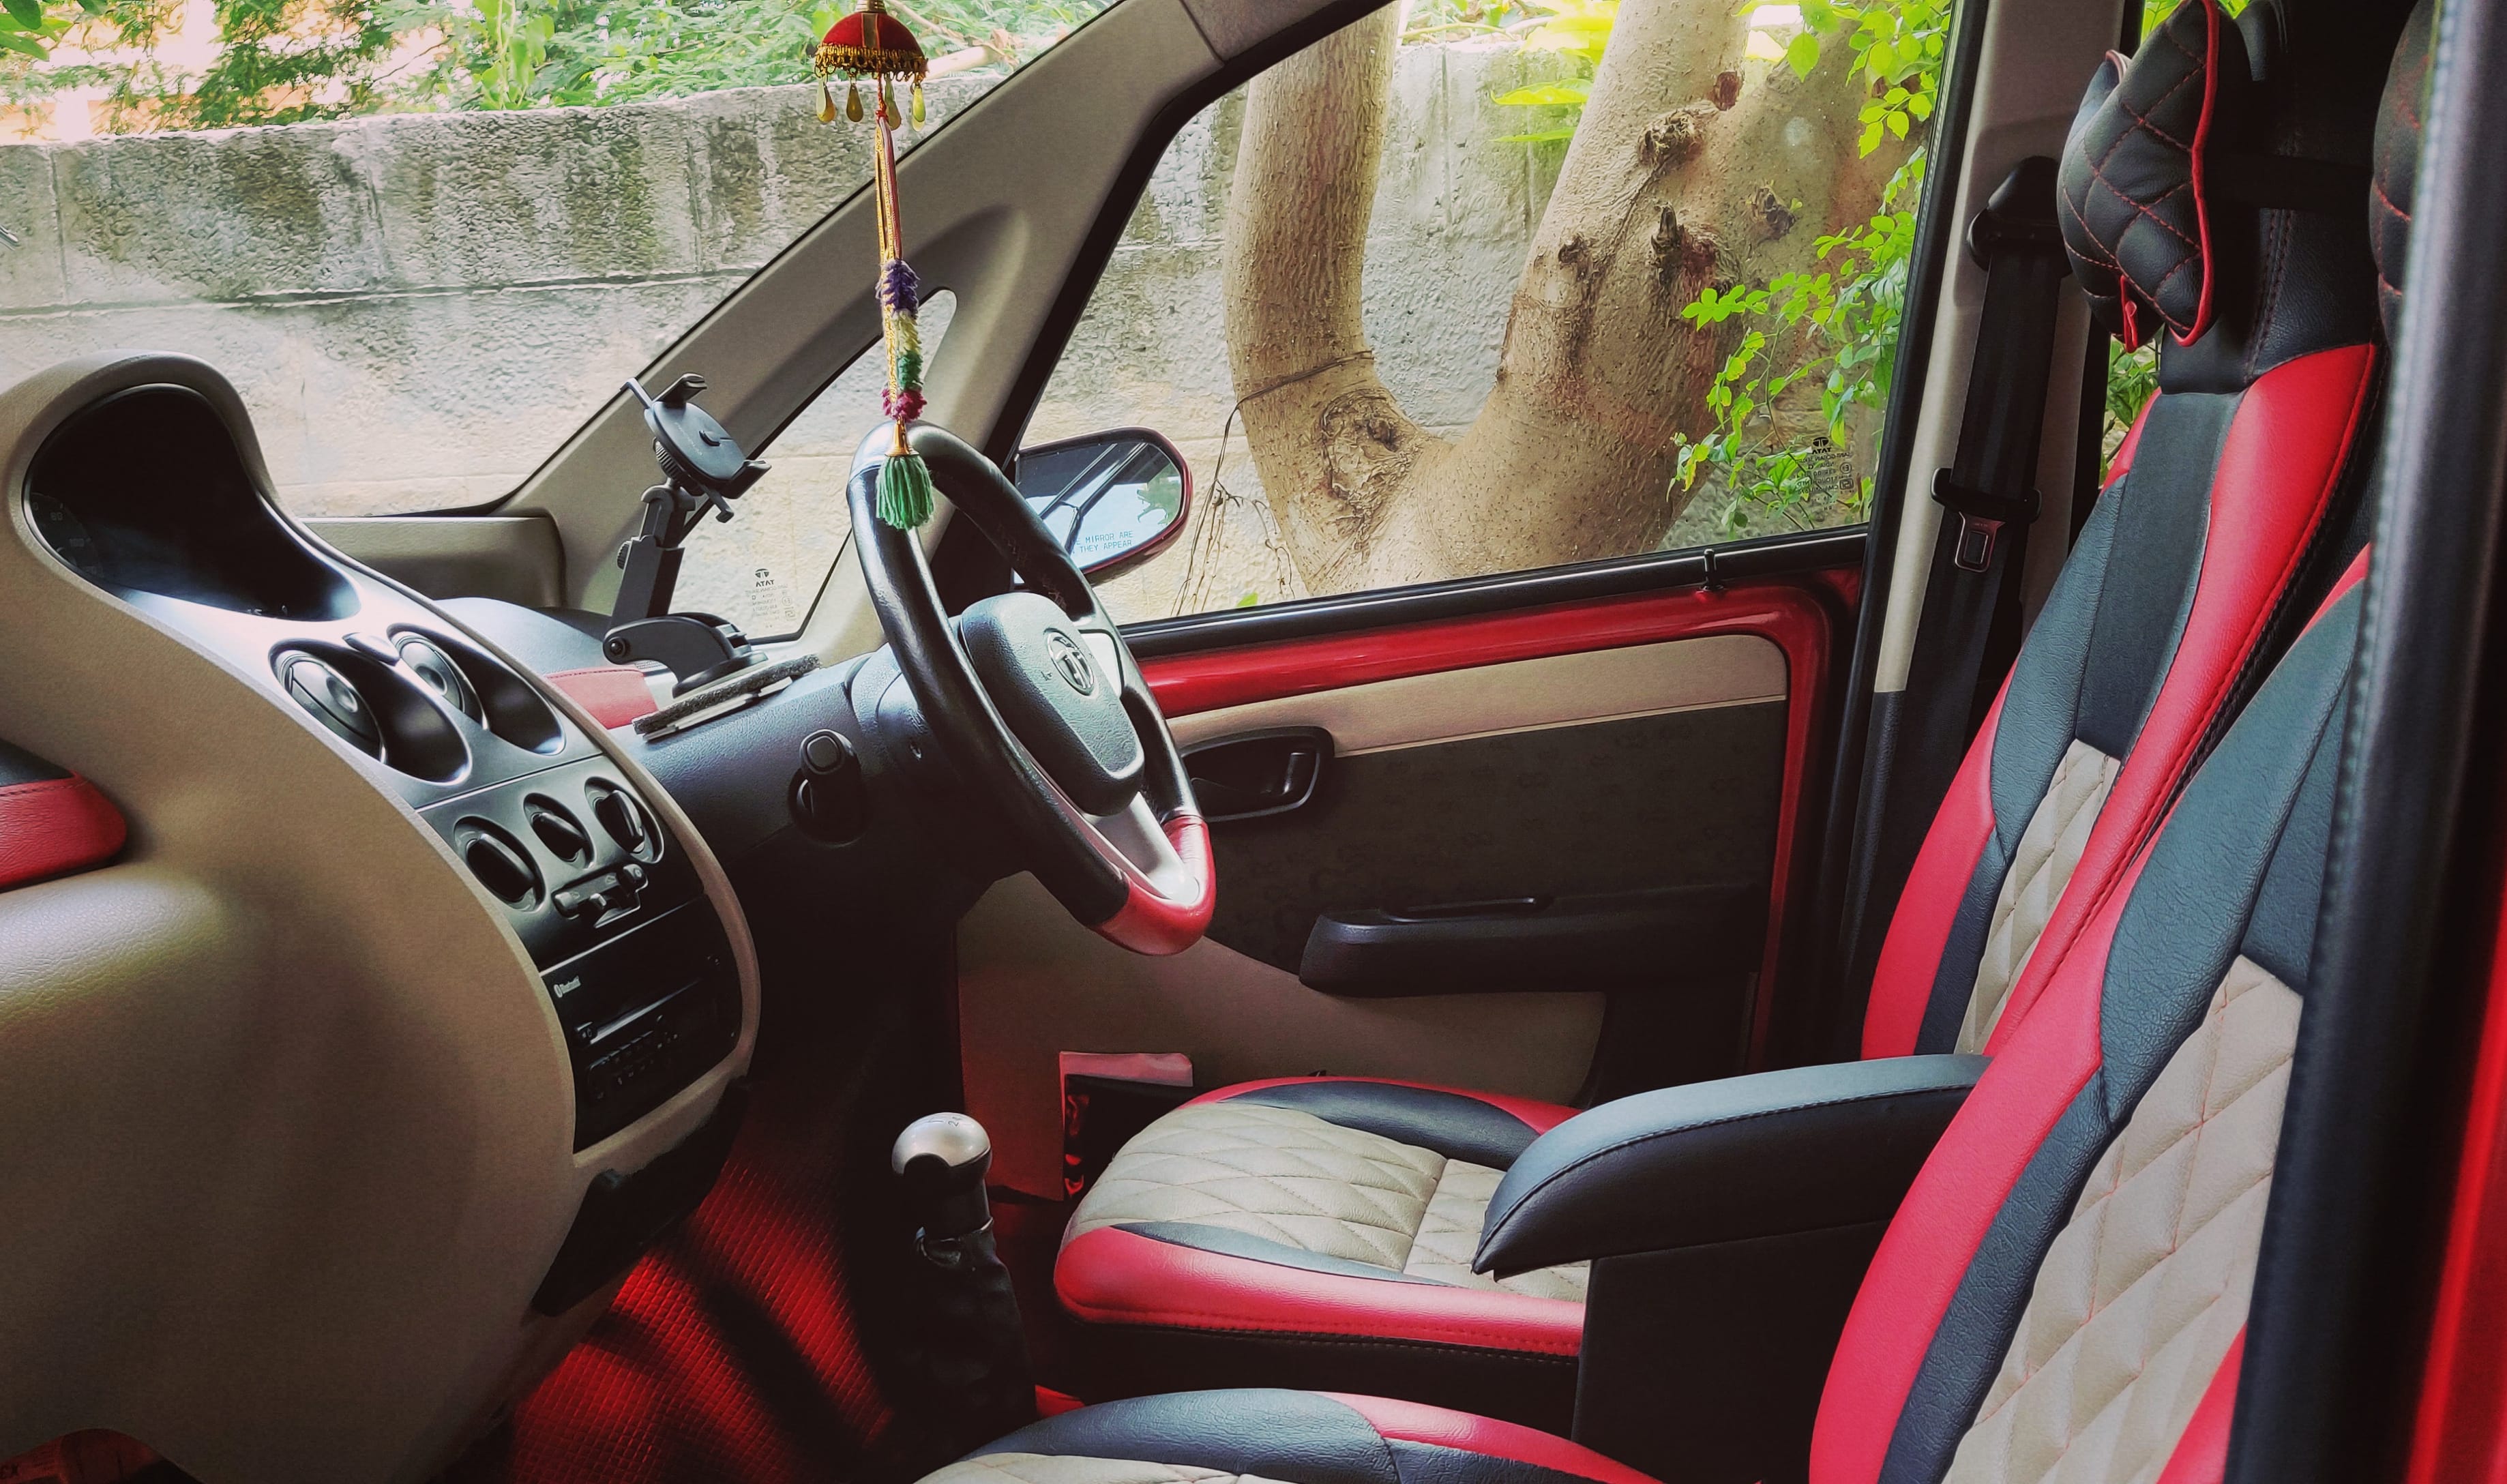
I thought I’d start with the essentials first. After some research, I got to know about the Nano zone, a rather small car modification shop near Lakshmi Mills in Coimbatore. So after enquiring details, I first got the horn and headlamps done. He suggested Osram 90/100 H4 bulbs and Hella trumpet (VW type) horn. Both were fitted with separate relays and the work was done by his boys up to good perfection. So after a few days, I left the car with him for 2 days to get the seat covers and ambient lighting done. I had thought of a custom design for the seat cover keeping in mind the interior theme colors and asked him to get it done. As the driver seat was not providing enough support for my long thighs, I thought of extending the seat base as well. He said it can be easily done, and yes indeed! Everything was done to superb perfection and the workmanship was great. Some extra foam had to be designed to extend the base, that’s all. All this was done for just around? 8750. Till date, the seat is very comfortable and can keep me fatigue-free on any long drive. Satisfied with the work, I started planning the next major works.
I have detailed the first phase of modifications in my Nano’s second 30,000km update review on our Youtube channel.
Phase 2:
As I was already planning for the Megapixel mods since the start of this year, I came across a few Nano images in Sri Lanka, which was running on 13” alloys from the Renault Kwid. So I too decided to get it done. However since I didn’t have the budget for alloys, I was trying to source some used Steel rims of the Kwid. Sadly, no luck. I tried asking the service centers but they too didn’t have 5 rims. At that time in February, a good friend helped me out in sourcing 5 Steel rims in Chennai.
In the month of June, I had ordered a rear fog lamp assembly unit for my Nano from Boodmo. All GenX Nanos have this empty slot on the rear bumper which would perfectly fit the OEM rear fog lamp offered on the Zest, Nexon, Altroz, and even the original Nano LX. Did it cost me just around? 500 was a perfect fit in that slot. I asked the Nano Zone guys to make it work in tandem with the brake lights. Till date, it works perfectly.
Upgrading wheels:
The wheels were received on 22nd June by paying a transport charge of? 500. Meanwhile, I had enquired about the cheap and best tire brands for 13-inch wheels, shortlisting CEAT, and Firestone. Did Firestone seem the cheapest? 2600 per tire whereas a CEAT would cost? 2750. After considering the fact that Firestone indeed was owned by Bridgestone and is the OEM tire offered on the Jeep compass, I decided to go ahead with it. However, after a couple of days when I went to get the new wheels fitted, Firestone was out of stock. I had to go ahead with CEAT, with a bargain of? 2700 per tire.
The larger wheels and 155/65 R13 tires were a perfect fit on the hubs. However, I had to remove the front mud flaps as they were rubbing on the tires every time I turned the wheel. Since there were only 4 tires in stock, I had to return a couple of days later for the spare tire. Every Nano owner, including the Nano Zone shop owner, warned me that the 13” tire wound never fit in the small bonnet of the Nano. However, it was an easy cakewalk. The new spare tire was fitted to the new wheel and in no time was inside the bonnet of the Nano. The old tires were almost worn out and were given as exchange for? 700 only.
Fitting these larger wheels drastically improved the feel of the Nano. Here are the observations after a few days running:
On the flip side, there were a few down points:
Overall, I was happy with the modification and so was my mother. I sold and couriered the stock 12” rims and wheel covers to another Nano owner in Bangalore for? 3550 including shipping. (The courier service idea was a mistake as the transport charge itself was 70% of the total cost of the wheels) The next thing the Nano needed was good looking wheel covers. However, I wasn’t able to find the right design suitable for my future modifications.
I asked the Nano Zone owner to help get the right design. One of the available designs from PRIGAN seemed to impress me. Though it was a plain design, it seemed ideal for the re-design I had in mind. So I started working on a custom design based on the plain one.
This was the custom redesign I had rendered.
Since repainting was not a good idea on the plastic surface as suggested by the Nano Zone owner, I asked him to do it using stickers. Gloss black and red reflectors were used to create this design and after a couple of days, on the 1st of July I got them ready my Nano was ready to cruise.
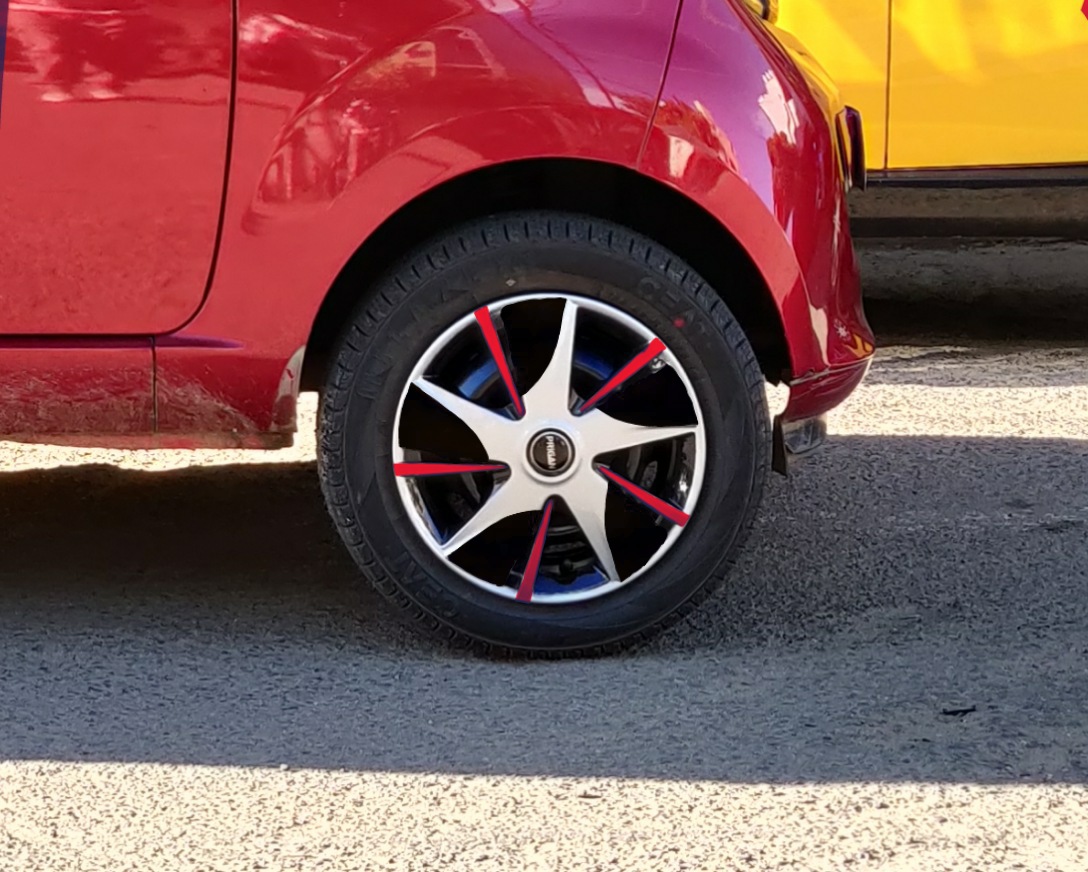
These custom wheel covers cost me? 1000. Impressive?
I also got the Probus mobile holder for Rs.650 from Amazon and did some DIY to get that stuck on the steering column panel. It doesn’t hamper road visibility and also works like a jugaad version of the Digital cluster navigation screens seen on premium cars.
Phase 3:
I was planning on a few exterior modifications:
I don’t prefer overtly flashy modifications, however, I wanted to have unique looking LEDs.
With black roofs being the trend, I wanted to get that done as well along with black on the running board door sills.
I was never a big fan of the thin French mustache of the stock Gen X, so decided to give it a larger, grille-like cohesive look as seen on the Megapixel concept.
A Nano club member had wrapped the gloveboxes in tan leather. I loved the idea and wanted to get something done on my Nano, but in line with the interior color theme. I decided to get red and black again.
I still had the stock key with the separate central locking buttons dangling on the rings. I wanted the keys to match the modifications carried out. So decided to get flip keys similar to other Tata cars.
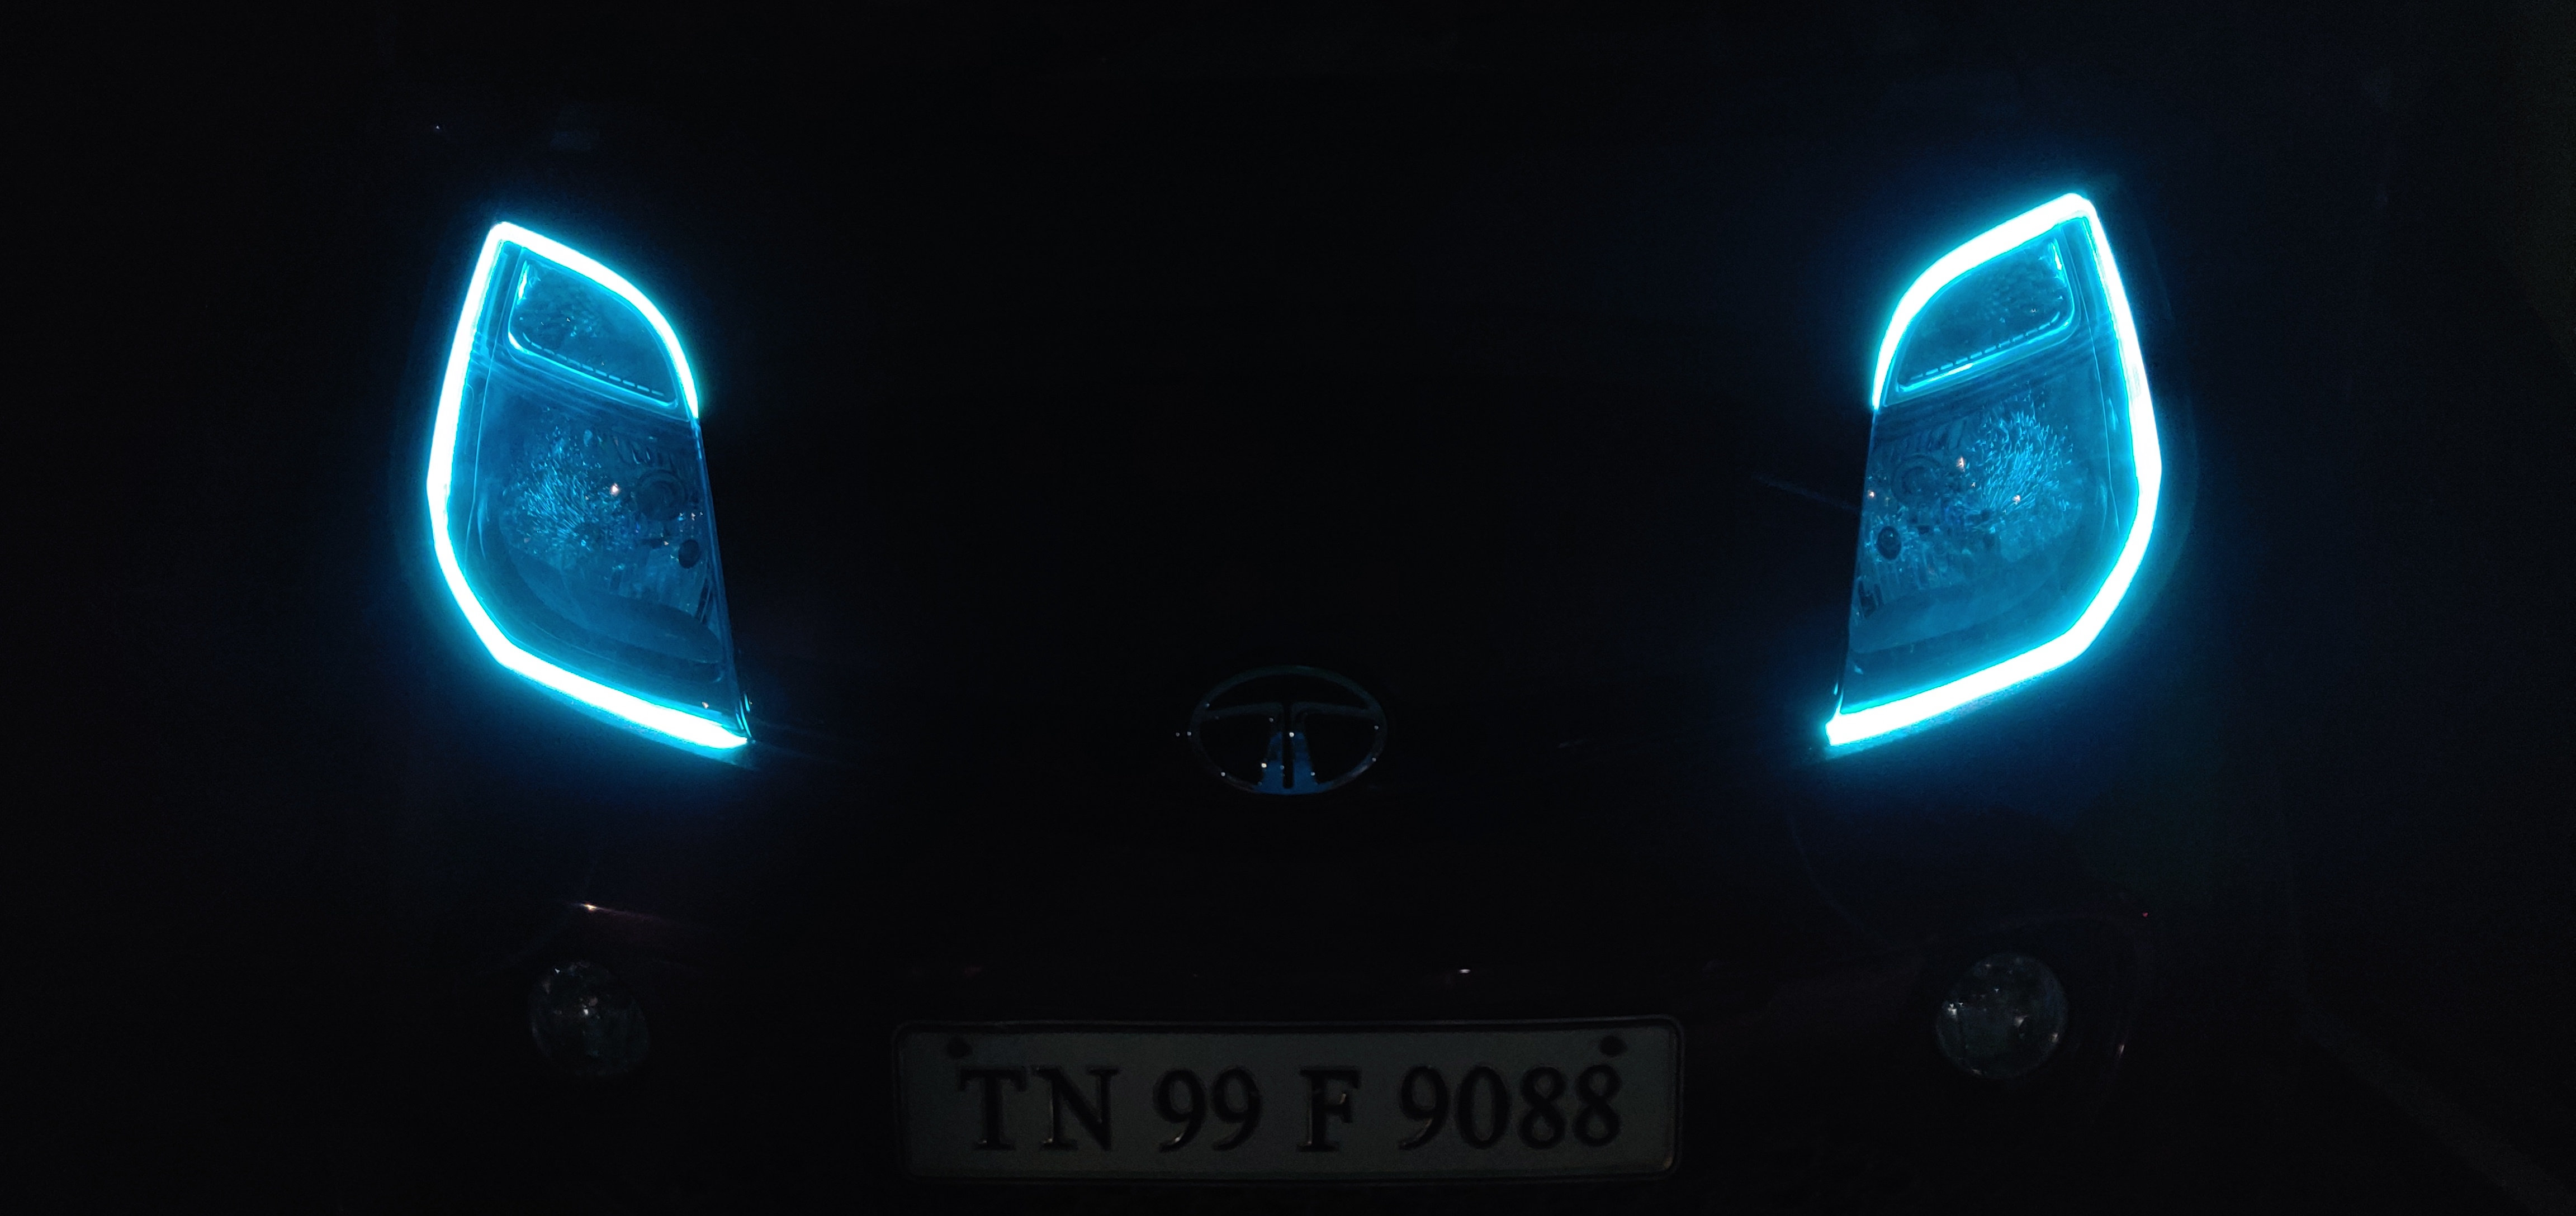
On 10th August I decided to get the LEDs done. Initially, I had planned the LEDs in the lines of the Nano Europa concept, but that seemed too simple. So after a lot of head-scratching, based on the suggestion of Mr. Nano Zone, I finalized this Feline-eye design. Nano Zone has some good quality options of flexible LED DRLs and the Cyan Blue seemed very cool and unique to me. So finalized on that.
I wanted these LEDs and the ambient red lighting to be connected to a 3-way switch:
The work quality and fitment were genuine and the end result was simply WOW! No matter where we go, they make a statement and turn heads. Here are some glimpses:
The next thing in line was the black detailing. I left the car with them the whole day of 13th August and took delivery in the evening. The work was again impressive and the Nano started to look more mature and sporty.
The gloveboxes and the speakers had to be removed from the dashboard to get the wrapping done. So had to drive without music and storage boxes for 2 days. On the final day when the boxes were ready, I decided to get the flip keys done. Left the car with them on the 20th morning and got the keys done by evening. Since the gloveboxes needed a bit more time, I got them fitted the next day afternoon. Though there is a bit of misalignment with the stitching line of the wrap and the gloveboxes take a bit more effort than before to open and close, the overall look is very premium and modern. Additionally, I also got noodle mats for the floor.

All this cost me a total? 7700 which is quite an impressive bargain.
After getting all these done, I made a teaser video of my Nano Megapixel edition for our channel and followers
By the second week of September, I decided to finish the mods and left my Nano at Nano Zone. I had to be with them to direct them with the cutting and shaping since it was not an easy design, to begin with. The badges on the boot were removed and the work was started. The front and rear grille lights too were to be done. After 2 days of work with black and silver stickers, the Megapixel edition was ready. The Nano Zone guys were kind enough to do a full-body wash before polishing and handing over the key to me.
Here's the “angry Bulbasaur” face at night:
All these mods cost me? 36,250 starting with the headlamps, horn, and completing with the body stickering.
Here is the detailed video on my “Tata Nano Megapixel edition”. I have covered all accessory details and drive feedback with the new 13” wheels:
As of now, I have also fit a center armrest for the front seats with a storage box. Due to the unusual size of my Nano's seats, the armrest had to be custom designed in order to fit perfectly. It is a removable unit and works perfectly well. Long drives will be even more relaxing than before!
As of today, my Nano has run around 33,700km and still going strong. Regarding service and repairs, I have spent just around? 6800 till date and hope the maintenance costs stay that way for years to come.
I am loving my Nano and living the Nano life, the Megapixel way!
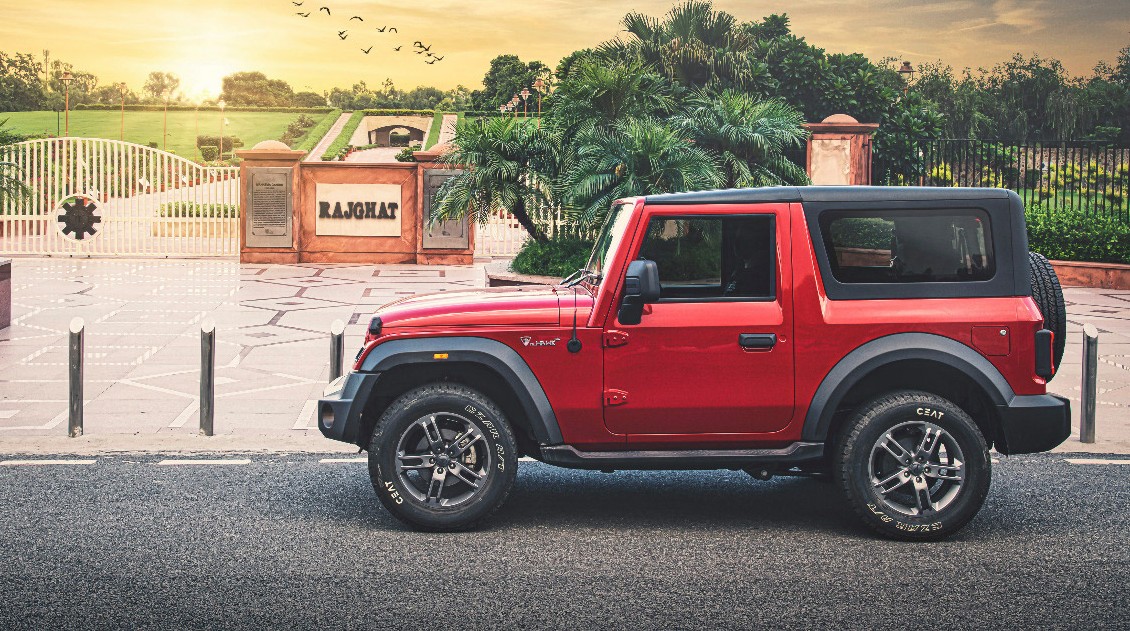
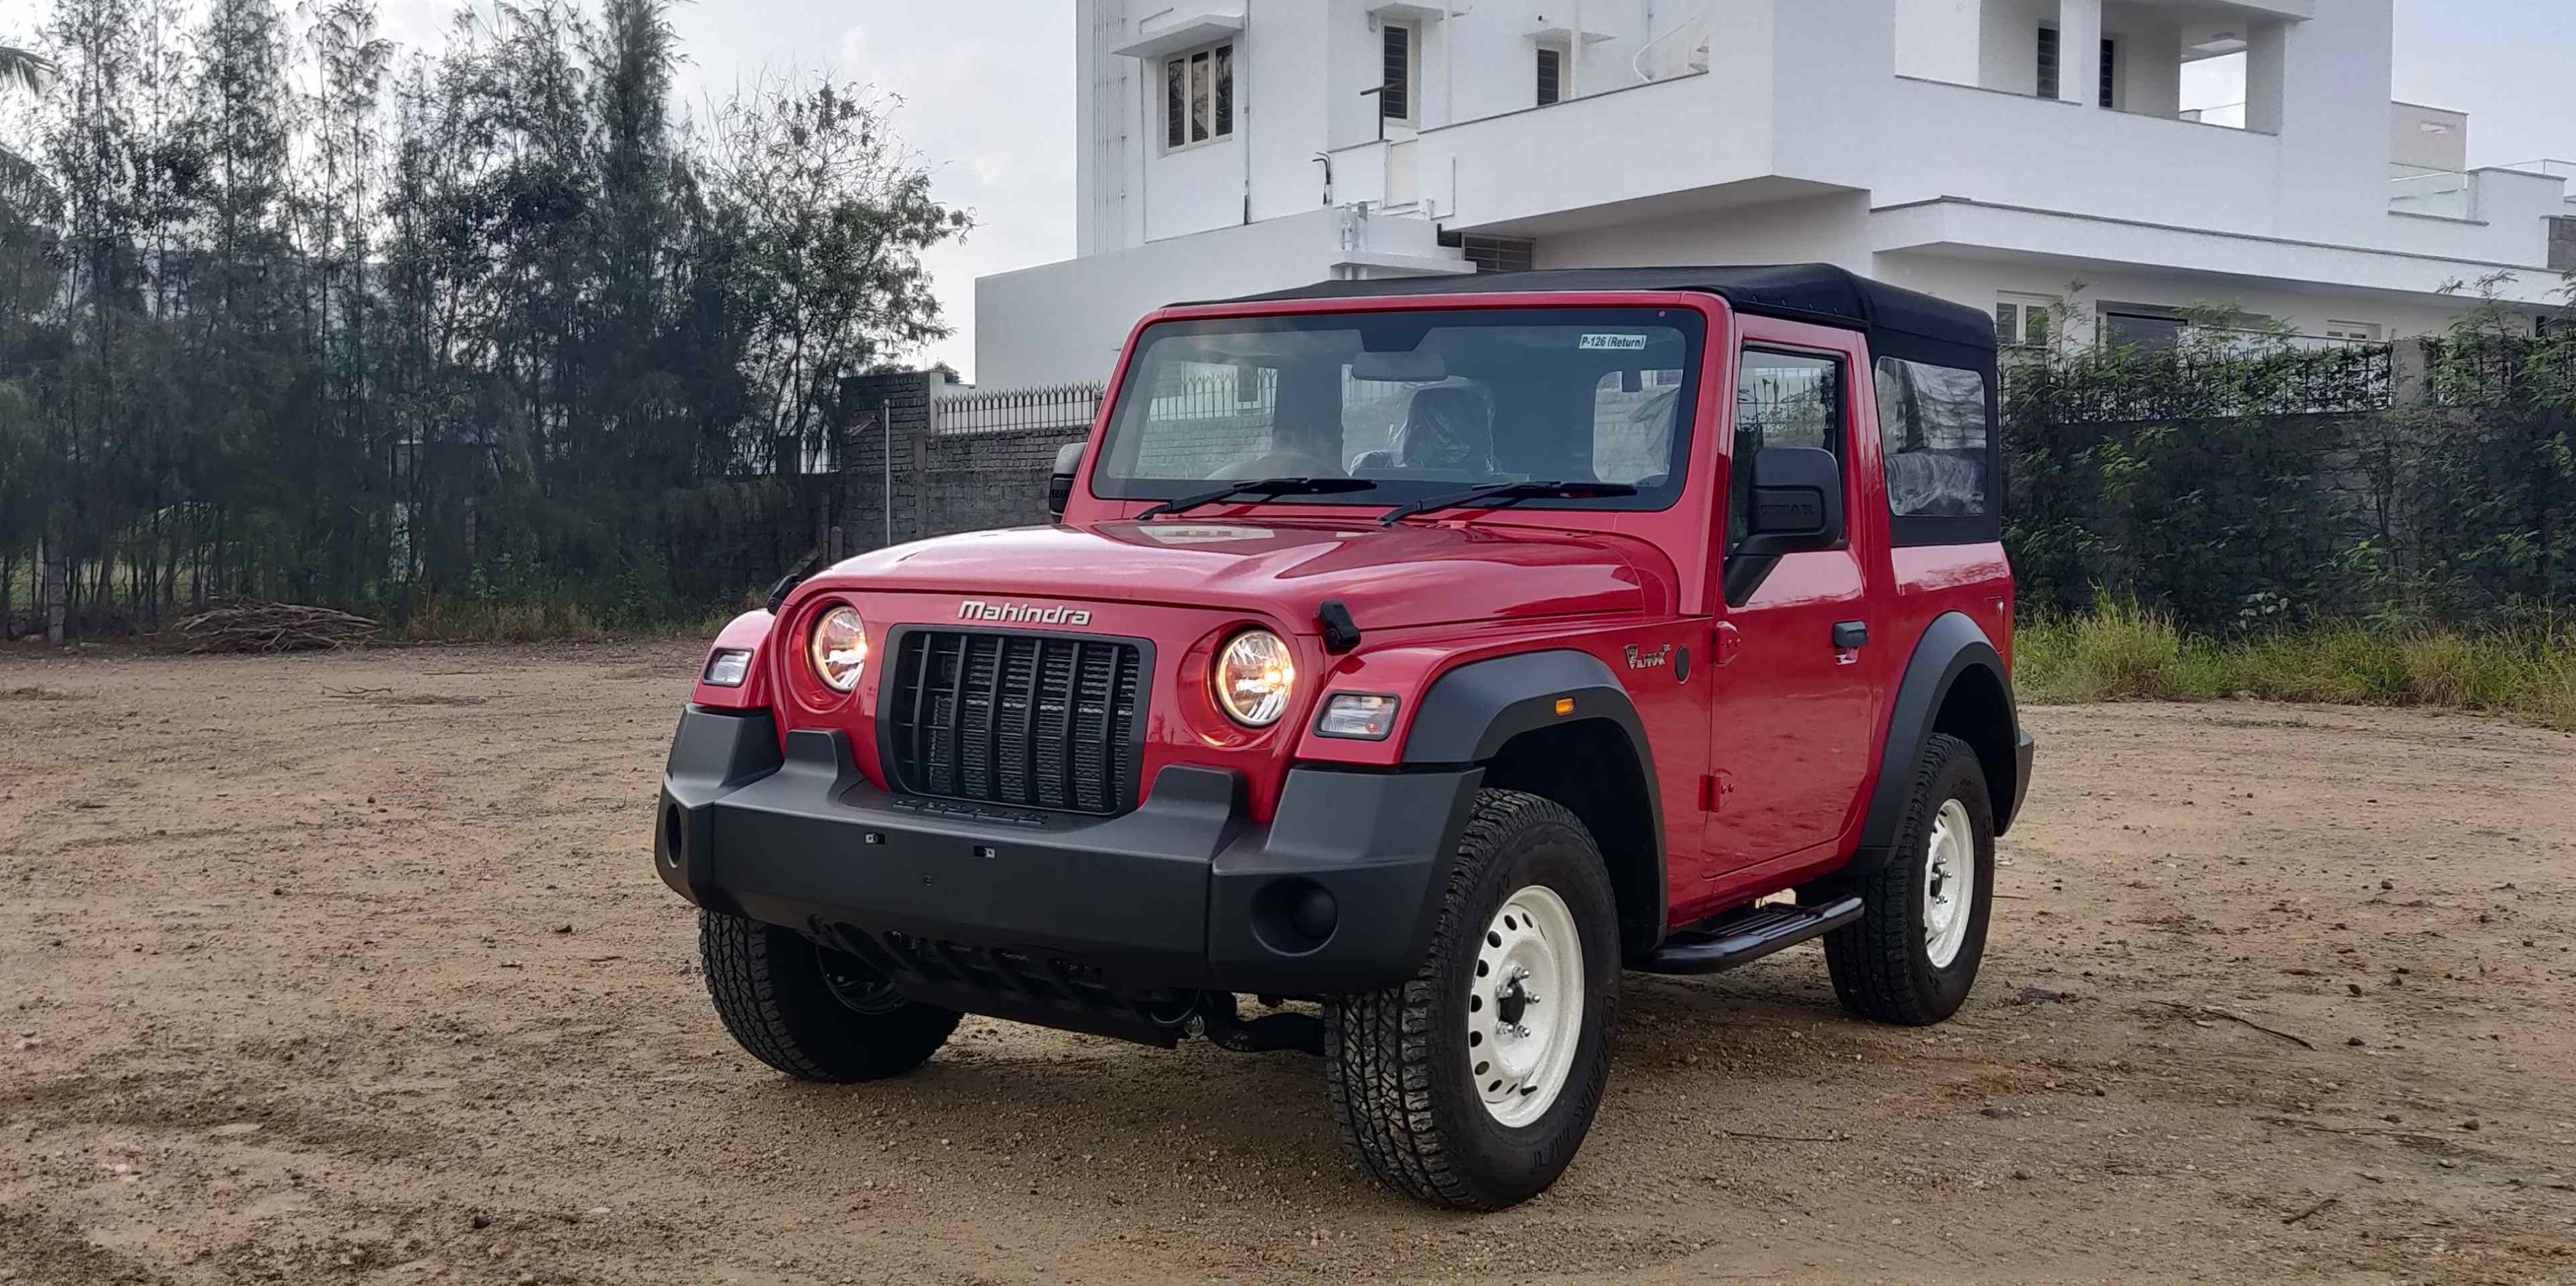
Mahindra is all set to launch their new generation Thar SUV on the 2nd of October. The new Thar is based on an all-new platform featuring lots of new features and new petrol engine option with an automatic gearbox. With this new-gen Thar, Mahindra has made it more road and user friendly. Here are all the details on the new Indian made lifestyle SUV.
Exterior:
The new Mahindra Thar has grown in every dimension while maintaining the traditional Thar design. With a wider track and longer wheelbase, the Thar now resembles the Jeep Wrangler. The front grille and the bumpers are quite
Interior:
The interior of the new-gen Thar gets revolutionary changes when compared to the previous model. The design, layout and materials are vastly superior with more creature comfort and features.
Variants:
The new-gen Thar will be available in two variant series; the Adventure focused AX series and the feature-oriented LX series.
The AX series variant offers the following standard features:
However, the AX series can also be had with an option pack including the following features:
The comfort-oriented LX series will include the following additional features:
All these features will make the new Thar more modern and comfortable for daily usage too.
Safety:
Safety features on the new Mahindra Thar BS6 include:
Powertrains:
The new Thar will be offered with both Turbo petrol and turbo diesel engines. The 2.2L MHawk turbo diesel engine produces 130PS Power and 300NM torque through either a 6-speed manual or a 6-speed Torque converter automatic gearbox (only on LX variants). Mahindra's new 2.0L MStallion turbo petrol engine will be debuting on the new Thar, producing Max Power of 150PS and torque of 320NM. The turbo petrol will be available with a 6-speed manual transmission only on the AX variants and with a 6-speed automatic transmission only on the LX variants.
All Thar variants will be available with a standard manual Shift-on the fly 4X4 transfer gearbox with diff locks.
Launch & price:
The new Mahindra Thar will be launched on 2nd of October with expected pricing from Rs10L to Rs11L ex-showroom for the AX series and Rs11.5L to Rs12.5L for the LX series. With all the additional features and power, we expect this new Thar to give a tough time to the urban-oriented compact Crossovers too. Bookings for the new Thar will be open by the end of September. Stay tuned for further details and pricing.


WOW just what I was looking for. Came here by searching for selfhackathon.com